Cindy Crushes Programming: Percy Jackson Book Nooks
I had always wanted to do a book nook craft and thought Percy Jackson would be a great one to start because I had teens outside my group of regulars and even a couple adult patrons join this program which was nice.
Supplies:
- Cardboard sheets
- Tape
- Hot glue
- Moss (dried)
- Electric Tea Lights
- Scissors
- Ruler
- Fairy door signs (see below)
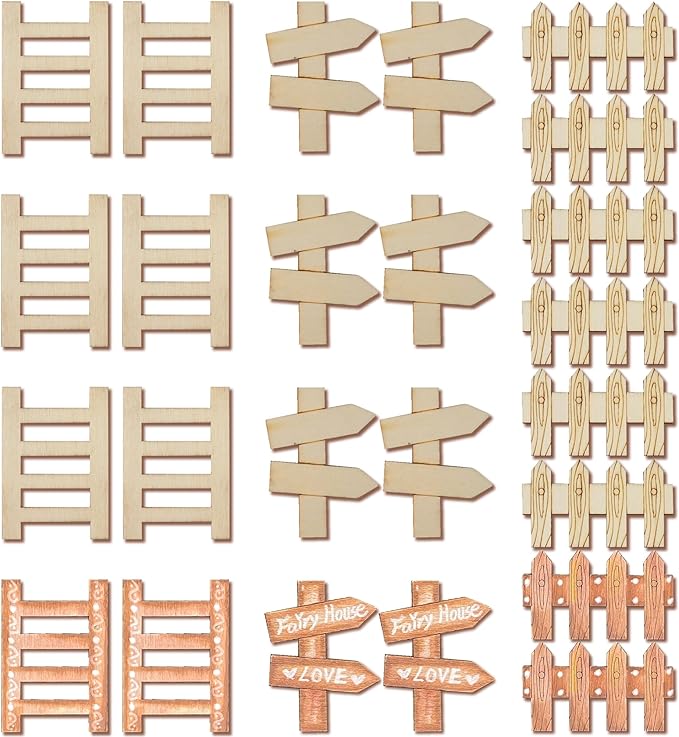
This was a group project but I have my coworker Nick Habel here to explain how they helped me make the boxes.
Here is how I made those boxes for the book nook craft!
You’ll need: Scissors, adhesive of your choice (depends upon what material you use), 3 pieces of thick paper or cardboard (chipboard, cardstock, cardboard, etc. Or one empty cereal box would work too), ruler (optional), pencil (optional).
ADVERTISEMENT
ADVERTISEMENT
For the example, I’ll use the measurements that I had for the box pattern I created, which used 2 8 1/2 x 11 sheets of cardboard, which I attached together with tape. I would recommend doing any bigger interior decorations between steps 3 and 4, and just decide which base will be the top and which will be the bottom, as it can be difficult to reach inside the boxes once they’re all glued together. Alternately, you can glue the main part together and decorate the inside between steps 6 and 7 before you add on the backing.
Step 1: Measure 1/4 inch up from the bottom of one of the short sides of 2 pieces of your cardstock, draw a line across if you’d like, and fold the short edge up along that line on both pieces of cardstock. This creates the tabs you will use to attach the two halves of your box together.
Step 2: Decide how wide you want your base to be – I chose 2 1/2 inches for mine – and then measure that length up from the 1/4 inch fold you just created on the same two pieces of cardstock, draw another line if you’d like, and fold it up. This creates the top and bottom of your box.
Step 3: Both pieces of cardstock should have two folds up from the same short edge, making a lopsided U shape. Turn one piece of cardstock so that the top and bottom are opposite each other and you have one long side on the right and left.
Step 4: Using the adhesive of your choice, attach the first 1/4 inch tab to the inside of the flat side of the other half of your box, making sure to line it up so that the top is flat. Do the same for the other side as well. Also be sure that your box stands upright at this point too, and if you have any excess above either of the folds, just trim it off.
Step 5: By this point, you should have a hollow rectangle, roughly the size and shape of a book with an open end on both sides. Tip it over onto your last sheet of cardstock so that one of the openings is flat on top of it – leave a little extra space from the edges of the page. Trace around the outside, so that you have a rectangle the shape of one of the rectangle openings and cut about 1/4 inch around the lines you made, so that you have tabs you can fold and adhere to your box to form the backing.
ADVERTISEMENT
ADVERTISEMENT
Step 6: Once you have your backing rectangle cut out, snip off the corners roughly at a 45 degree angle – but be careful to only trim off just up to the line you traced, not past it, or else your backing may have holes.
Step 7: Fold each of the edges of your backing up along the lines you traced, so that your rectangle fits inside then adhere the tabs using the adhesive of your choice to the outside or inside of your box. If you’re planning to cover your box with decorative paper, it won’t matter if the tabs are visible, but if you’re leaving the outside blank, you may want to adhere them to the inside.
Step 8: Turn it upright so that you have a book-shaped book nook and then decorate with your choice of materials, slip between books on your shelf, and enjoy!
Signs were made with help from my coworker Elaine Waite.
She measured the signposts and made a template on Canva, which she then customized them (still in Canva) to the buildings we wanted to highlight in our book nooks, such as the cabins, sparring arena, and Big House. She then printed the templates, cut out the signs, and glued them to the premade signposts. She also decided that while the electric tea lights were a nice touch and were necessary to light the nooks, she wanted to make them look more like they belonged in a camp. So she printed out strips of paper printed with bricks (also found on Canva) and cut and glued/taped them to the candles to make them resemble the large fire pit that is referenced in the Percy Jackson books. She recommends wrapping your candles with a base layer of blank paper to avoid the light from the candle showing through the bricks when you turn it on.
My part of the craft
I worked on the inside of the box. I found a woodsy background and printed it and taped it to the side of the inside of the box. I then found a Camp-Half Blood image and out the column and the camp half blood sign and taped that to the outside of the box. The Image that had been inside the column I used for the far part of the box in the back. I put moss on the bottom of the box and hot glued it. The moss was the only thing I hot glued. I used the campfire and other decorations as part I could move within the box.
Final thoughts: I really liked this craft and was so lucky my coworkers were very talented and able to help me. This is such a fun craft to make.
Filed under: Cindy Crushes Programming, percy jackson, Teen Programming
About Cindy Shutts
Cindy Shutts is the Teen Services Librarian at the White Oak Library District in IL and she talks programming every 1st and 3rd Wednesday. You can follow her on Twitter at @cindysku.
ADVERTISEMENT
ADVERTISEMENT
SLJ Blog Network
Notes on April 2024
Lifetime Achievement Awards and Upcoming Books: A Talk with Christopher Paul Curtis
Unhappy Camper | This Week’s Comics
ADVERTISEMENT

