Cindy Crushes Programming: DIY Paper Flowers
Spring is here, even though it snowed during my craft last night. Paper flowers are one of my favorite crafts to do. They are cheap and simple. When you think papercraft, you probably think Origami. But the truth is, there are a tons of ways you can engage tweens and teens with papercraft beyond Origami (which is awesome). And the thing about papercraft, is it can be very inexpensive programming! We’re all looking for creative, fun and – inexpensive! So don’t forget to check out your library’s papercraft collection when thinking of inexpensive programming ideas. Today, just in time for spring, I’m going to walk you through a DIY paper flower tutorial.

Supplies:
- Ruler
- Colored Paper
- Glue or two sided tape
- Scissors
- A thin round stick (I used a tiny flag pole stick. I tried to use an pencil but it was too large)
- Pencil
Steps for Making Your Flower
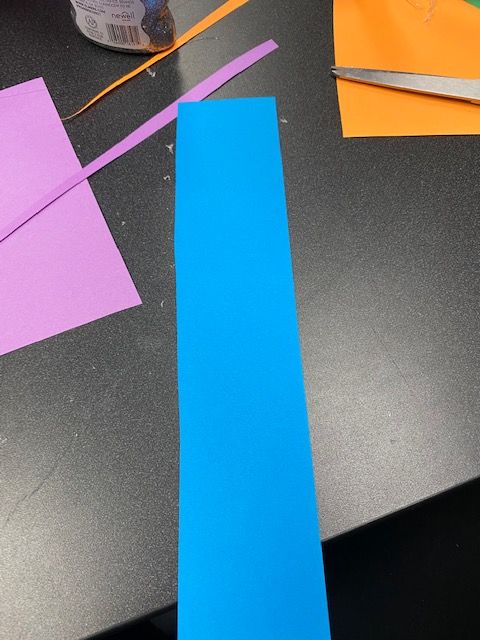
Step 1: Cut a strip of colored paper that is 2.5 inches.
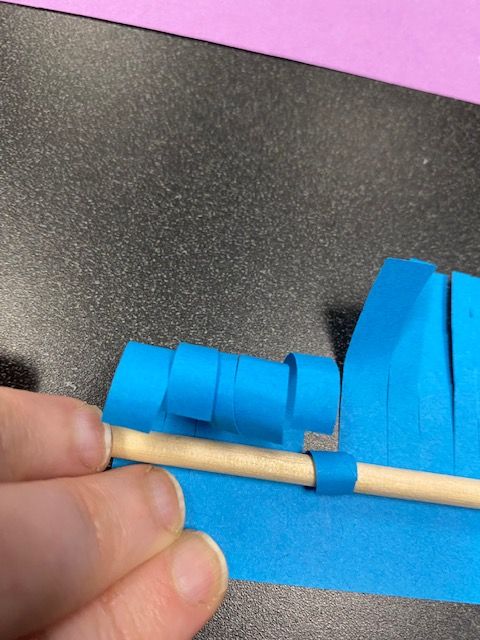
Step 2: Make cuts 2 inches into the paper leaving ½ inch still intact. Then curl the strips with your stick.
Step 3: Make a stem. You use green paper and roll it along with the stick and glue it along the way.
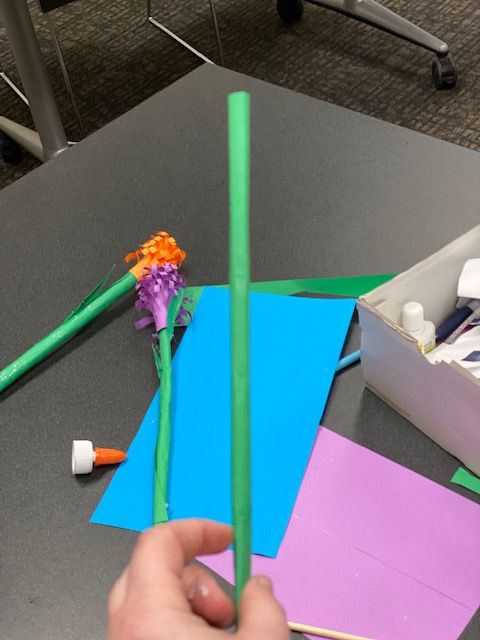

Step 4: Glue the curls section on the intact part of the strip going down the stem of the flower
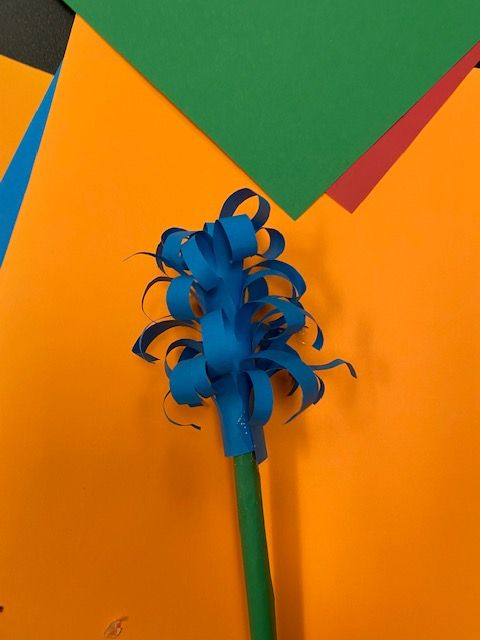
Step 5: You can add leaves using the green paper as needed
This is easy and fun and very cheap. Have fun!
Filed under: Cindy Crushes Programming, Teen Program in a Box, Teen Programming, Teen Programming in a Box, Uncategorized
About Cindy Shutts
Cindy Shutts is the Teen Services Librarian at the White Oak Library District in IL and she talks programming every 1st and 3rd Wednesday. You can follow her on Twitter at @cindysku.
ADVERTISEMENT
ADVERTISEMENT
SLJ Blog Network
One Star Review, Guess Who? (#206)
“Complex social dynamics exist in the simplest of conflicts.” A Kyle Lukoff Interview on Sorry You Got Mad
UnOrdinary | Review
ADVERTISEMENT