DIY Neon Signs
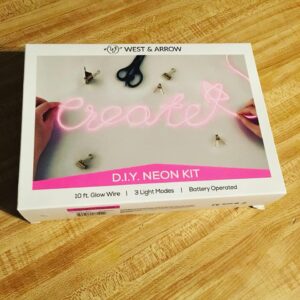
Sometimes, in order to find new activities to do with teens, I buy kits and try and find ways to adapt them to do in the library with teens. For Christmas, I bought each of the girls this DIY Neon Sign kit because it was cool, but also because I thought it would make a cool Teen MakerSpace activity. All the supplies can be bought individually to do as an activity, but the El wire needed is kind of pricey. So I would recommend doing this as a group activity to make signs to decorate a teen space as opposed to having each teen make an individual neon sign to take home, depending on your budget.
Supplies:
- El Wire (approximately $10 ; there’s an 8-pack available for $23.99)
- A strong gauge wire (some sites recommend 16-guage jewelry wire) that will hold it’s shape (here you can buy 8 yards for $9.91)
- Pliers
- Scissors
- Paper
- Marker
- Zip ties (some sites recommend a hot glue gun)
- Optional: a piece of wood for a background
Cost for an individual sign: Approximately $5.00
Step 1: Creating Your Template
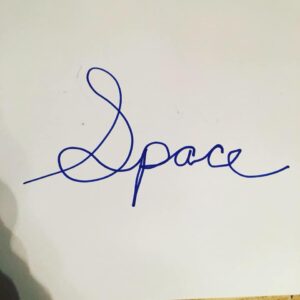
Using your paper and marker, write out the word or saying you want your sign to say. For a library teen space, I recommend something like “Books” or “Read”. For a Teen MakerSpace, you could go with something like “Make” or “Idea Lab”.
ADVERTISEMENT
ADVERTISEMENT
You want to write crisp and legibly and – most importantly – in cursive because you need all of the letters to connect.
This will be your template.
Step 2: Making Your Wire Word
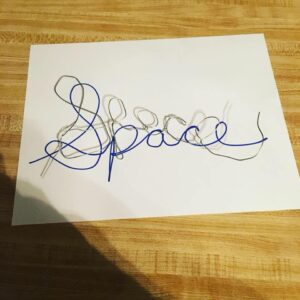
You now want to use the template to bend your wire into the word you are trying to make. I found this worked better with two people and two sets of hands. The pliers will also help. When you are done bending your wire into your word, you can also use the pliers to close the gaps on some of the letters, like the end of the letter P and the curve in the letter C below.
Step 3: Making the El Wire Word
You will then take the El wire and bend it to form into the wire word you made in step 2. At this point, you will have the metal wire which is guiding you in making the word out of the El wire.
Step 4: Attaching the Two Words
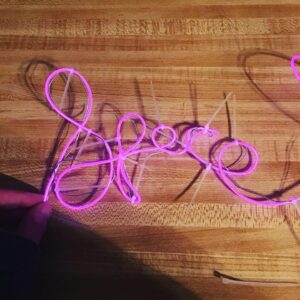
We attached our El wire to the wire word using zip ties. After you attach the El wire and the guide wire, you can snip the zip tie ends and you really don’t see them. Other sites recommend joining the two with a hot glue gun.
Finished DIY Neon Sign
The finished product is really pretty cool. If I had to do it again, I might use a painted piece of wood or canvas as a background for my sign. I will say bending the wire to make some of the letters was hard and I have not been satisfied with the letter “a” in the middle of the word space. Once you have the El wire, depending on how you attach the two wires together, you can actually take your project apart and make new words.
Here are some additional tutorials to help you . . .
Rookie DIY Neon Sign Instructions
Filed under: DIY, Makerspace
About Karen Jensen, MLS
Karen Jensen has been a Teen Services Librarian for almost 30 years. She created TLT in 2011 and is the co-editor of The Whole Library Handbook: Teen Services with Heather Booth (ALA Editions, 2014).
ADVERTISEMENT
ADVERTISEMENT
SLJ Blog Network
2024 Books from Pura Belpré Winners
Passover Postings! Chris Baron, Joshua S. Levy, and Naomi Milliner Discuss On All Other Nights
Winnie-The-Pooh | Review
Parsing Religion in Public Schools
ADVERTISEMENT

