MakerSpace: Paintpouring, chemistry in the art room
Welcome to one of the messiest yet coolest art processes out there: paint pouring. Paint pouring involves, well, pouring paint and just kind of allowing art to happen. It’s a cool process because you don’t have strict control over the outcome. It creates a kind of marbled looking art piece. I have done this with kids and teens and it’s pretty cool. In fact, The Teen has a canvas she has done hanging in her room and you can see her end result at the end of this post.
Supplies:
- Acrylic paints (Michael’s sells multi-color packs for $8.00)
- Pouring medium of your choice (we used good old fashioned glue)
- Craft sticks
- Plastic cups (and a lot of them)
- Hair dryer
- Tablecloth to protect your work surface
- Pan, box, or other container to put your canvas in (I recommend aluminum baking pans)
- Items to hold up your canvas for the pouring process (we used some of our plastic cups)
- Trash bags (to dispose of your waste immediately)
- A canvas, piece of wood or some other element that you are going to paint
- Some people wear gloves (we were reckless rebels)
Additional Paint Pouring Resources
Step 1: Prepare your work area
This is a messy, messy activity so the first thing you are going to want to do is prepare your work space. I recommend tablecloths on the floor and on the table. Put them everywhere! Cover everything. I mentioned it was messy, right?
ADVERTISEMENT
ADVERTISEMENT
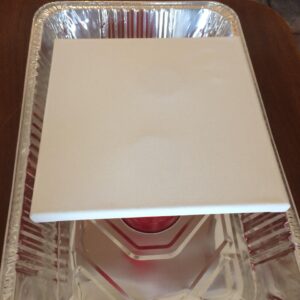
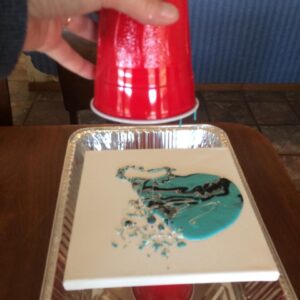
Then, set out your aluminum pans which will provide an additional layer of protection. These are essential because you are going to be literally pouring paint and you need something to catch the paint that runs off the canvas. You want something with high edges that you don’t mind throwing away. You can use extra plastic cups (or blocks of wood) to hold your canvas up inside the tray because you want to be able to pour your paint all over the canvas and allow it to run off. Your initial set up will look something like the picture above.
Step 2: Prepare your paint
You are going to use multiple cups for this process. This is also where your paint pouring medium comes in and I recommend reading this good discussion about pouring mediums before proceeding.
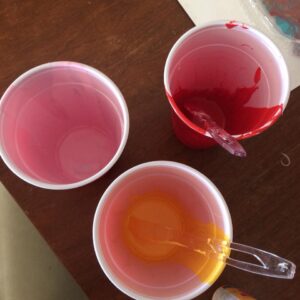
First, you will pour a single paint into a single cup and add a bit of your paint pouring medium (formula below). In this case we are using old fashioned liquid white glue to make this activity more cost effective because I’m working on a library budget. You can also buy something that is actually called a “pouring medium” at most craft stores. In these cups, you want to use a craft stick and mix your paint and pouring medium together really well.
Formula: You want a glue to paint ratio of about 50-50. So fill the cup 1/3 full with paint, 1/3 full with glue, and leave yourself 1/3 of the cup empty to have room to mix.
You don’t have to add any water, but you can add a few drops of water to help your mixture flow better if you would like. But very few drops. Spoiler alert: this is chemistry in action!
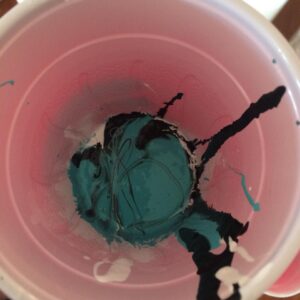
After you have mixed your initial single paints, you will pour them all into one cup. This is called a “dirty pour” mixture. You can drag a craft stick through it, but don’t blend them together. This is just to get the paints to mingle a bit inside the cup.
Right after creating your dirty pour, flip your cup over onto the canvas. You can literally set the cup upside down on the canvas. When you remove the cup, the paint will then begin pouring down your canvas. You can gently kind of lift corners of the canvas to help direct the paint flow if you would like, but the idea is to let gravity do its thing and see what happens.
Step 4: Releasing air bubbles
It is possible that you will have air bubbles, which is where the hair dryer comes in. A gently applied heat from a distance will help release those air bubbles. If you do so gently, you can also use the hair dryer to help get the paint flowing in certain directions as well.
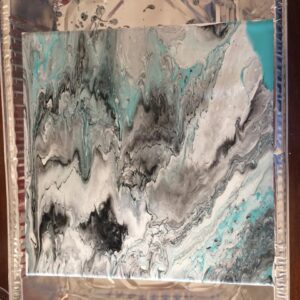
This is what The Teen’s final canvas looked like:
Step 5: Stand back, let it dry, and clean up your mess
ADVERTISEMENT
ADVERTISEMENT
This is a fun art project, but it’s messy and takes a while to dry. If you have the space to set canvases aside so that they can dry over night, then I definitely recommend this activity. No one is taking their project home on the day of this event if you do this in a library or makerspace.
When we were done I just threw everything into the trash, so this craft is by no means environmentally friendly. The one exception is that I did save the aluminum pans to be reused.
Taking your canvas to the next level
After you canvas has dried, and I would give it some solid days of dry time, you can do things like add letters cut with a vinyl cutter to put quotes to kind of embellish your canvas. This step is not necessary, however, because the final project is beautiful on its own.
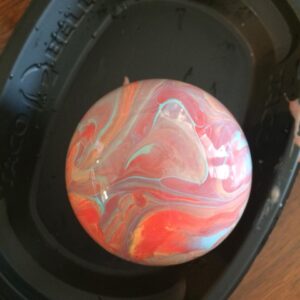
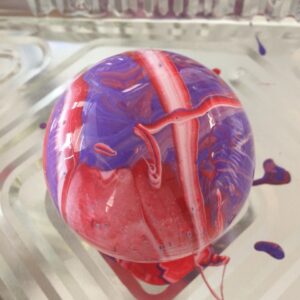
We also used this process to decorate ornaments, so you are definitely not limited to using a canvas (which can be kind of expensive if you have to buy a lot of them).
303 Best Acrylic Pouring Inspiration images in 2018
Filed under: Uncategorized
About Karen Jensen, MLS
Karen Jensen has been a Teen Services Librarian for almost 30 years. She created TLT in 2011 and is the co-editor of The Whole Library Handbook: Teen Services with Heather Booth (ALA Editions, 2014).
ADVERTISEMENT
ADVERTISEMENT
SLJ Blog Network
The Moral Dilemma of THE MONSTER AT THE END OF THIS BOOK
Cover Reveal and Q&A: The One and Only Googoosh with Azadeh Westergaard
K is in Trouble | Review
Fighting Public School Book Bans with the Civil Rights Act
ADVERTISEMENT


