MakerSpace: Low Tech, Low Cost Printmaking
Recently while cruising the craft store I came across two items that greatly intrigued me:
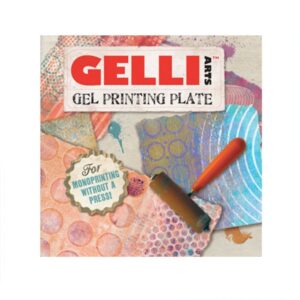
1) A Gelli Printing plate
 2) Jane Davenport acrylic stamps
These are two different types of art styles, but I used the inspiration of both and realized that it is a type of monoprinting or printingmaking that is being done here. In addition, when you start adding more layers, it becomes a mixed media collage. There are some really great resources out there for these projects. And if you have teens that like to journal, this type of art is often incorporated into journaling. You can also use this process to make framed art, cards, and tags, to name just a few ways that this technique can be incorporated into other artistic endeavors.
The art of the monoprint – Monoprints
Nine Types of Printmaking You Need To Know – Artsy
Gelli Arts: Monoprinting without a Press!
This is a great YouTube video to introduce the process and share some techniques:
I liked the effect that these processes have, but it’s the end of the year and buying a bunch of supplies for something like this for our Teen MakerSpace was a little cost. The Gelli Printing plate itself was around $30.00, and then you need ink, a brayer, etc.
ADVERTISEMENT
ADVERTISEMENT
So because it’s a MakerSpace, we set about the task of making something similar using lower priced supplies, many of which we already keep on hand in our space. And we did.
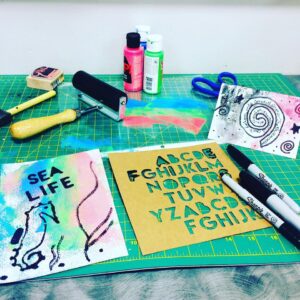
Supplies:
- A sheet/page protector (yes, the kind you use in a 3-ring binder)
- A piece of cardstock (placed inside the sheet protector)
- A brayer
- Acrylic paint
- Stamps
- Stencils
- Sharpies, black is preferred
- A surface protector
- Baby wipes (to clean up afterwards)
Here’s What We Did
1. Creating a low cost printing surface similar to a Gelli Printing plate
The Gellit Monoprinting Plate is designed to be used over and over again, so we made a low cost version using a sheet protector and a piece of card stock. Insert the card stock into the sheet protector to keep it from moving as much. The sheet protector cleans up easily using a baby wipe and works really well. You can’t get much lower cost than this.
2. Creating your inkscape
The first part of this mono printing process is to put little drops of some type of ink/paint onto your surface and cover the surface using the brayer. We used acrylic paint (it’s cheap) and an inexpensive brayer. The brayer is used to spread the ink around. Be careful not to mix up your colors to much as they will become muddy.
3. Creating your paper
You then take your paper – and here it is best if you buy a little fancier of an art paper as opposed to using copy paper, which does work in a pinch – and place it face down on the ink smear. This transfers the ink (or paint) onto your paper. You want to make sure your paper is completely dry before you do any next steps with it.
4. Getting creative
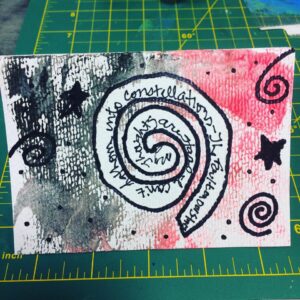
You can add texture and white spaces by using things like stencils, Washi tape, leaves and other found objects, etc. For example, to create this spiral white space, I simply hand cut a stencil out of clear contact paper and removed it once my paint was dry. I then added a book quote into the white space.
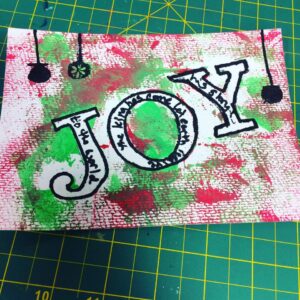
Here I used stickers of the word Joy which I removed after my paint had dried. And yes, I wrote the lyrics of Joy to the World incorrectly.
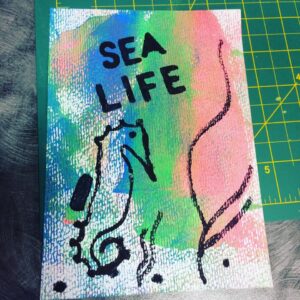
Here I used a Sharpie and some stencils, hand drawing the seaweed in, to create a type of underwater seascape.
There are several ways you can make your own stamps using things like erasers and wine corks:
CORK STAMPS : 6 Steps (with Pictures) – Instructables
Make Your Own Diy Custom Eraser Stamps.: 4 Steps (with Pictures)
There are also several ways you can make your own stencils using things like a vinyl cutter (higher tech) or more low tech options using card stock, overhead projector sheets or some other type of plastic, or clear contact paper (as I did above):
DIY: How to Make Your Own Stencil – Project Nursery
Make Your Own Stencil: 5 Steps
A few notes:
If you want to make it more Jane Davenport in style, use watercolor paints instead of acrylic paints.
This is a great craft for the pages of discarded books. You can put a light ink wash across the page and a bold black silhouette and make recycled book art.
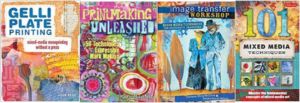
And because we believe in having books to support our MakerSpace stations, here are some of the books we have purchased:
I love the way our creations look and highly recommend adding printmaking into your MakerSpaces.
Filed under: Makerspace
About Karen Jensen, MLS
Karen Jensen has been a Teen Services Librarian for almost 30 years. She created TLT in 2011 and is the co-editor of The Whole Library Handbook: Teen Services with Heather Booth (ALA Editions, 2014).
ADVERTISEMENT
ADVERTISEMENT
SLJ Blog Network
2024 Books from Pura Belpré Winners
In Memorium: The Great Étienne Delessert Passes Away
Winnie-The-Pooh | Review
Parsing Religion in Public Schools
ADVERTISEMENT

