MakerSpace: DIY Iron On Patches
Our newest MakerSpace station at The Public Library of Mount Vernon and Knox County was inspired by a teen I know in Texas, and it has proven to be very popular.
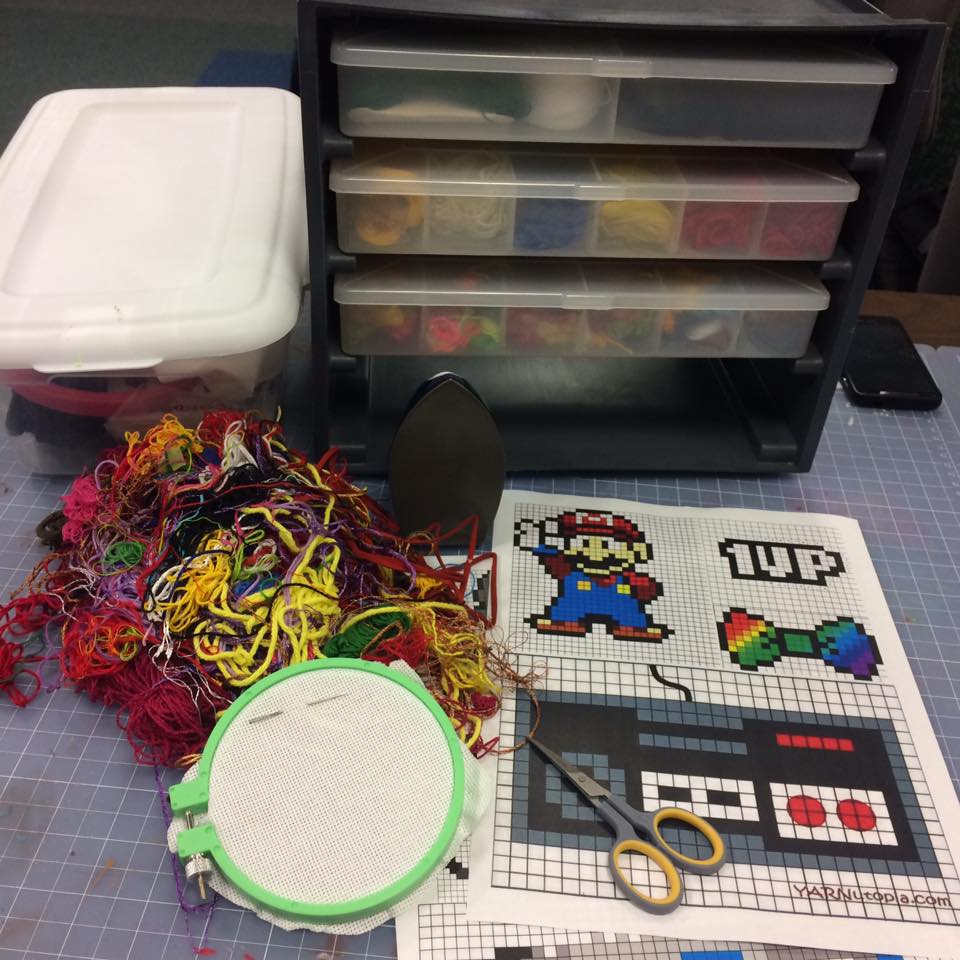
Technique Used: Cross Stitch
Supplies Needed:

- Cross stitch fabric
- Craft floss
- Cross stitch needles
- Small cross stitch hoop
- Small scissors
- Small cross stitch patterns (perler bead patterns work best for this)
- Permanent peel and stick fabric adhesive
- Iron
Step 1: Patterns
We have found that perler bead patterns work really well and are plentiful on the Internet. They also have a lot of pop culture characters that the teens are interested in. All you have to do to find a pattern is Google “Character Name + Perler Bead Pattern”. We print off two copies, one for the teen and one to keep in a pattern notebook for future use. There are several good Pinterest boards out there with a large collection of perler bead patterns:
ADVERTISEMENT
ADVERTISEMENT
949 best Perler Bead Patterns images on Pinterest | Pearler beads
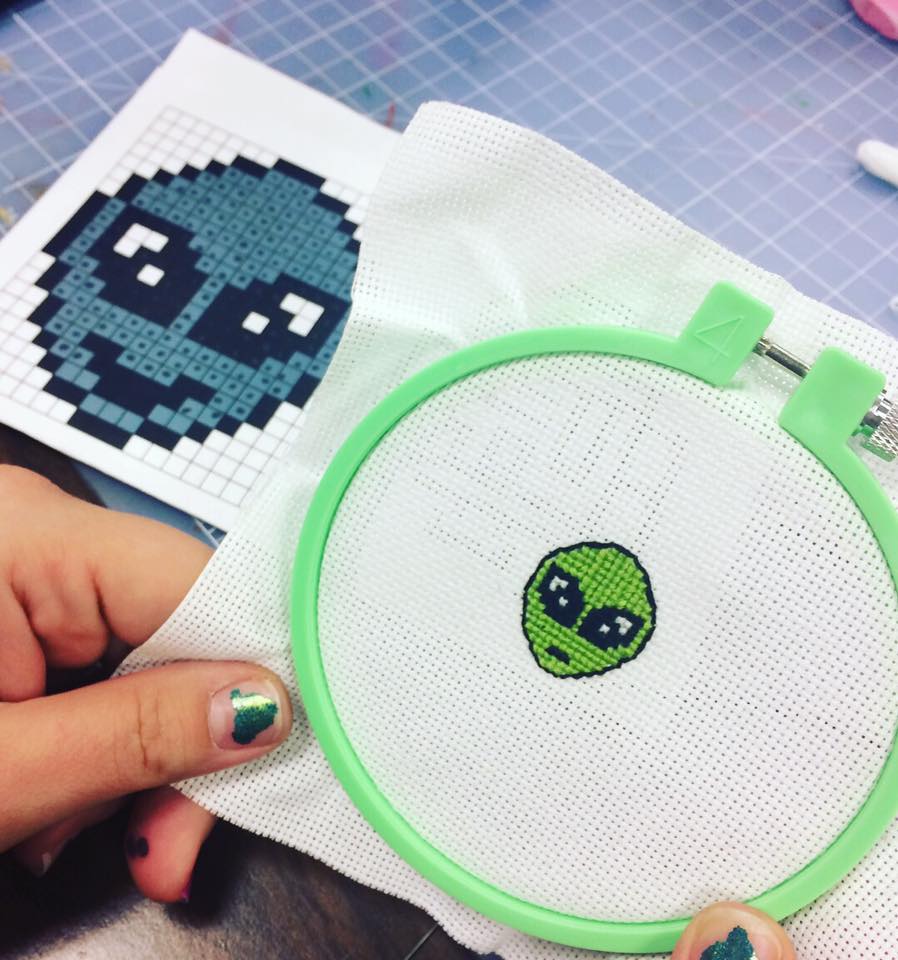
Step 2: Cross Stitch 101
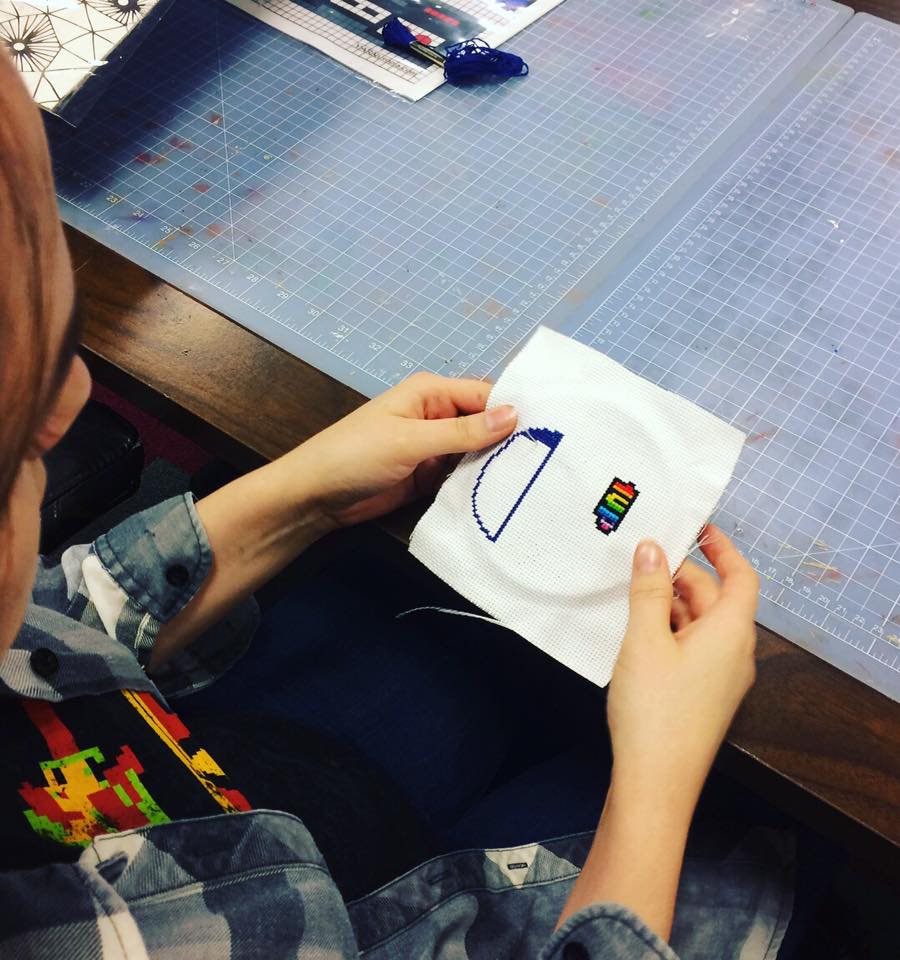
You will then follow your pattern to create your patch. Some teens pencil the pattern onto the fabric, but this is not necessary. It depends on your skill level. Our teens are using YouTube tutorials to help them learn how to cross stitch.
From WikiHow: The Easiest Way to Cross Stitch – wikiHow
- Cut your fabric and floss. The size of your fabric will depend on the size of the pattern you are using. …
- Thread your needle. Take your single thread of embroidery floss and create a loop at the end. …
- Begin your cross stitch.
- Continue stitching.
- Finish your piece.
- Wash your cross stitch.
Step 3: Cutting Out Your Patch, the First Time
After you complete the cross stich portion of your patch, you then need to use your little scissors to cut it out. Leave a little bit of a white edge around your patch.
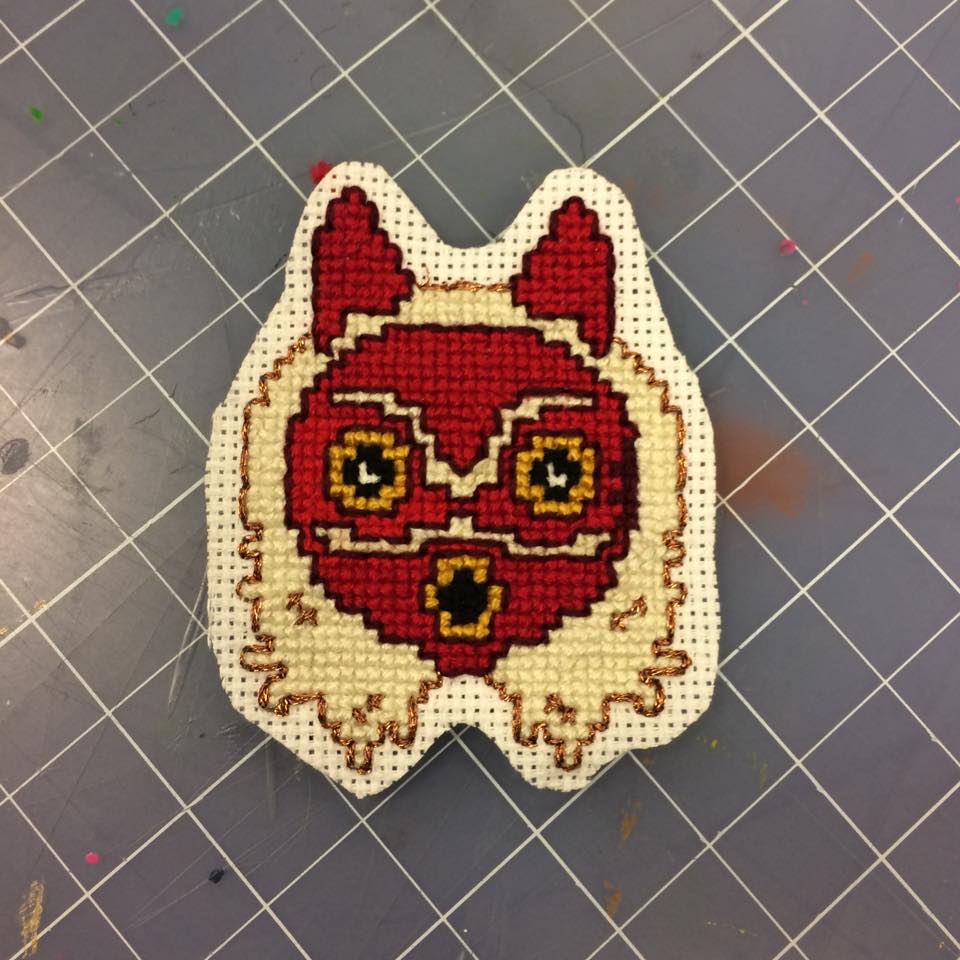
Step 4: Making it Stick
You then want to iron your permanent peel and stick on the back of the patch. Then you’ll have to cut it out again around the edges. You can fin HeatNBond Ultrahold in the fabric aisles of craft stores. You’ll want to by fabric sheets, not the skinny strips, so that you can work with any and all sizes of patches.
Step 5: The Big Iron On
You then iron your patch onto your book bag, jeans, purse, whatever. Just follow the instructions on the HeatNBond.

It’s a longer maker project, depending on the size and complexity of your pattern, but the teens are loving it.
Online Tutorials:
DIY Iron On Patches by PaulTheDIYGuy – Nerd Crafting
Make Your Own Decorative Patches With Cross Stitch – Crafts
Filed under: Makerspace
About Karen Jensen, MLS
Karen Jensen has been a Teen Services Librarian for almost 30 years. She created TLT in 2011 and is the co-editor of The Whole Library Handbook: Teen Services with Heather Booth (ALA Editions, 2014).
ADVERTISEMENT
ADVERTISEMENT
SLJ Blog Network
Happy Poem in Your Pocket Day!
This Q&A is Going Exactly As Planned: A Talk with Tao Nyeu About Her Latest Book
More Geronimo Stilton Graphic Novels Coming from Papercutz | News
Parsing Religion in Public Schools
ADVERTISEMENT

Hey Karen,
Nice tips you shared on making cross stitch patches. I loved the Perler bead pattern crafted by you. I am also going to design for my nephew his favorite cartoon Mario and gift him on his Birthday next week.