MakerSpace: Low Tech, Low Cost “Screenprinting”
For some time now I have been on a quest to get a screen printing station into my Teen MakerSpace. My research involved reading a ton of books, a lot of trial and error and visiting a local art studio that did traditional screen printing. The big stumbling block for us is that to make screens for screen printing, you have to do a technique that involves emulsion. This was a no go for us. The second stumbling block is that screen printing can take up a lot of space, something which is a very hot commodity for us; We are a small space.
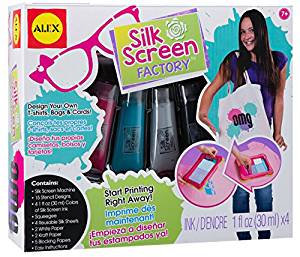
We also tried several low cost kits, some of which sere made by Klutz and Alex; these also proved to be less effective than we liked. Though we did keep the screen part of one of the kits because although you don’t need it for the method we chose to go with, some teens like to use it because it has a more authentic feel. But in a pinch, you can also make your own screens (more on that in a minute).
ADVERTISEMENT
ADVERTISEMENT
Some exhaustive research and a lot of trial and error led us to a couple of low tech, low cost scenarios that do indeed work. It’s not truly screen printing, but it is a low cost, low tech way to achieve the same effects.
What You Need:
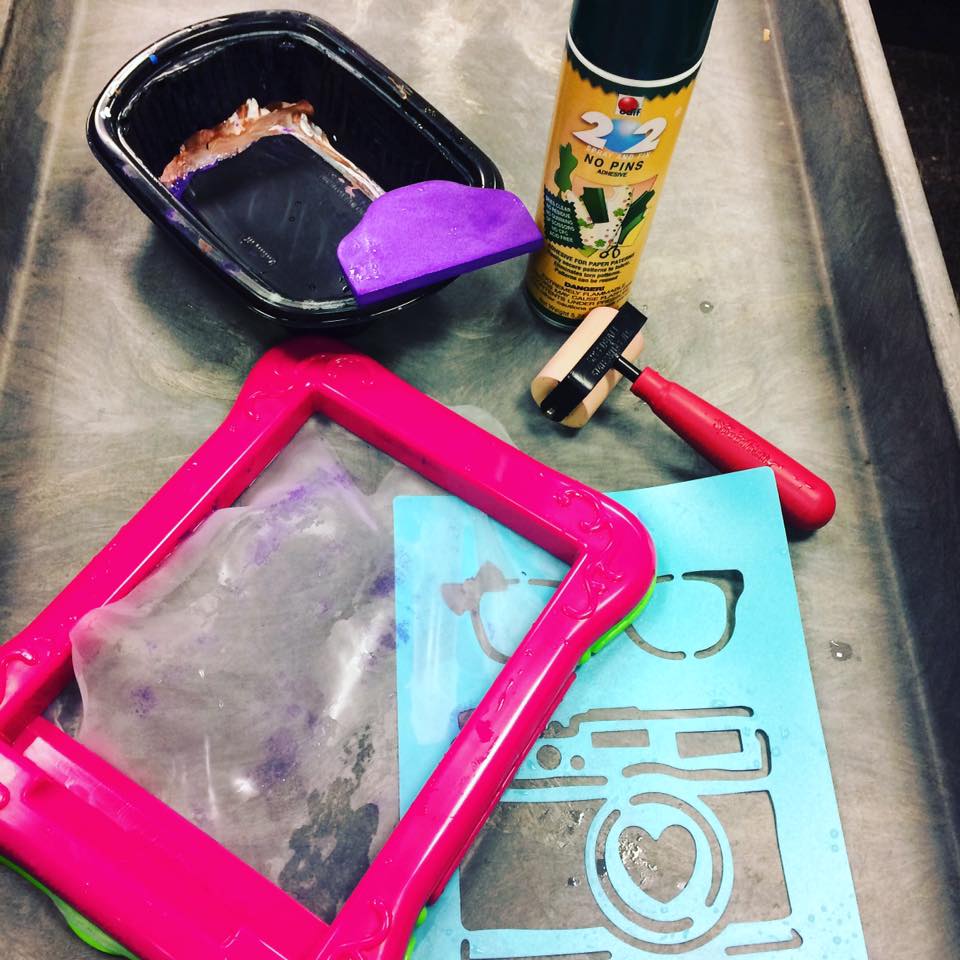
- Stencils (store bought or you can make your own, see below)
- Fabric paint or Speedball ink (you want something that will stand up to multiple washing)
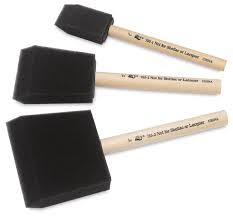
- Sponge brushes (or you can use an ink roller or flat edged screen printing scraper thing)
- 202 No Pins spray fabric adhesive
- T-shirts
- A screen (not necessary, but it makes it feel more authentic)
- A clean, protected surface to work on (you’ll want to cover your work surface to protect it)
- A hair dryer, fan or heat gun to speed up drying
Getting Started with Stencils
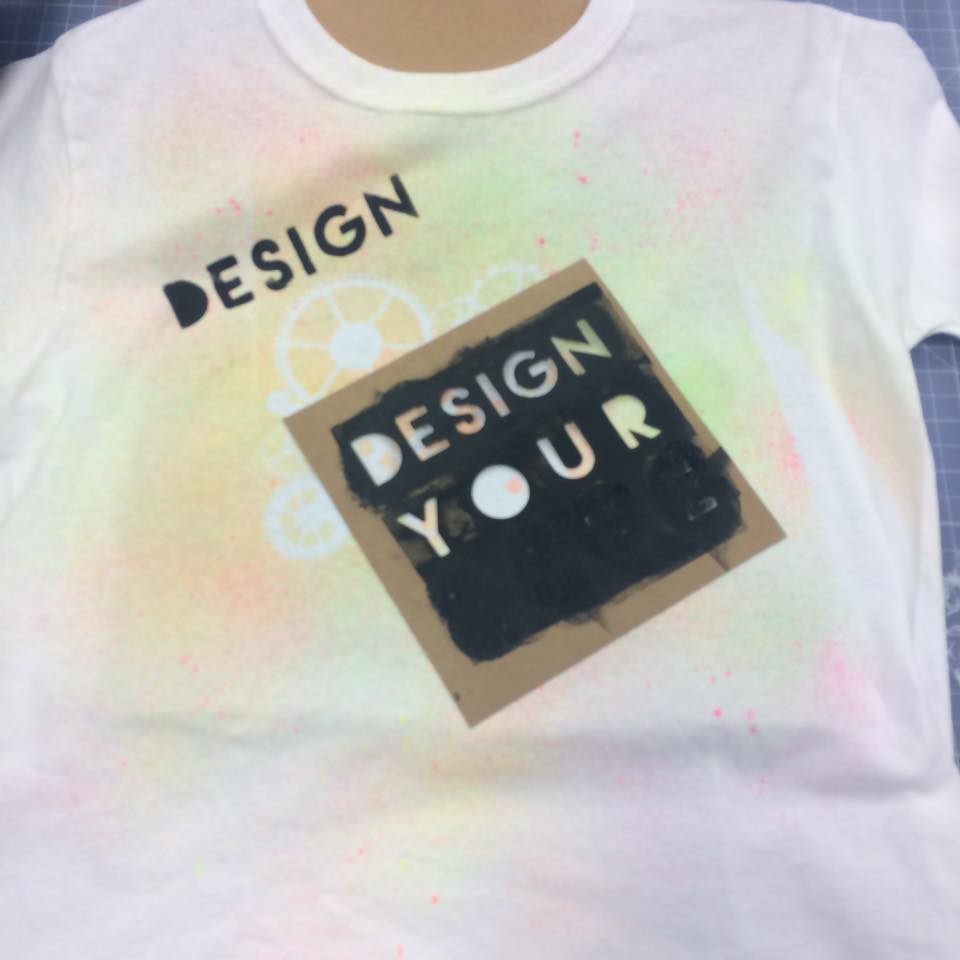
Stencils are used to make your design on your t-shirt. In true screen printing, there is a multi-step process that is used to make your stencils that involves emulsion. We just don’t have the means for this in our library space. But you can achieve some of the same effects by using stencils. And to give it a more authentic and hands on feel, you can make your own stencils in a couple of different ways.
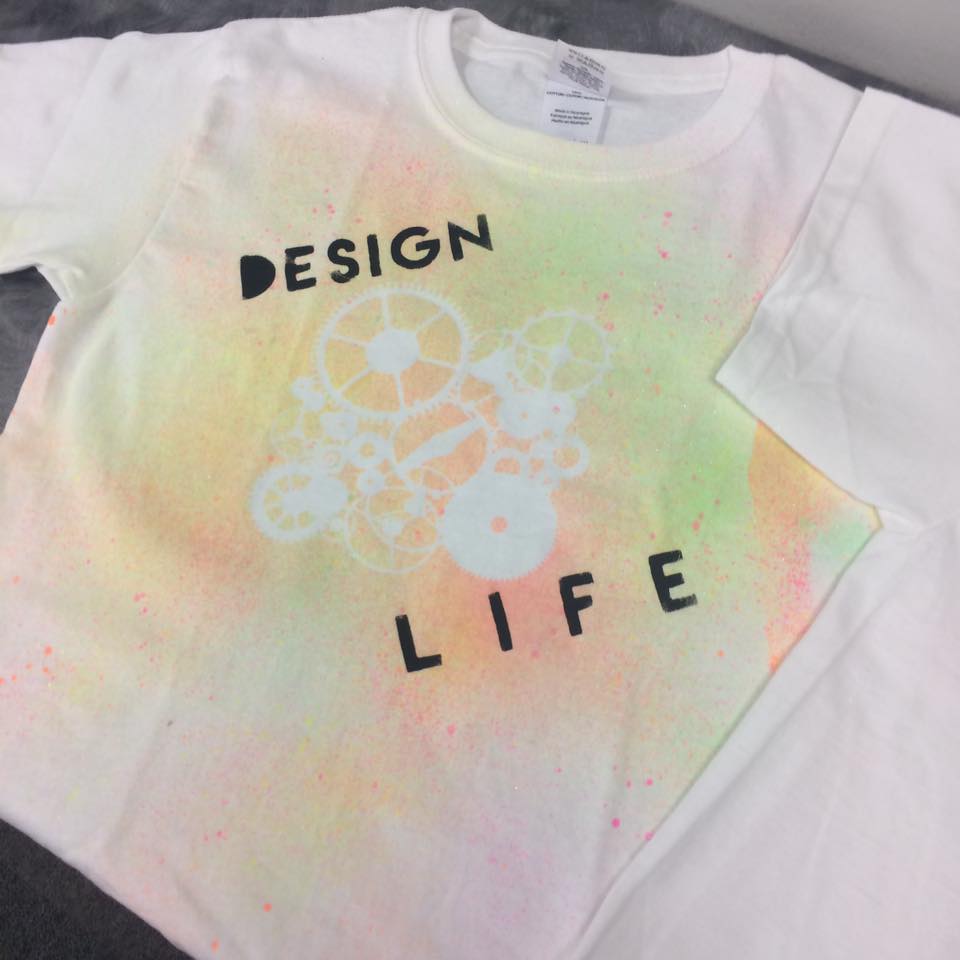
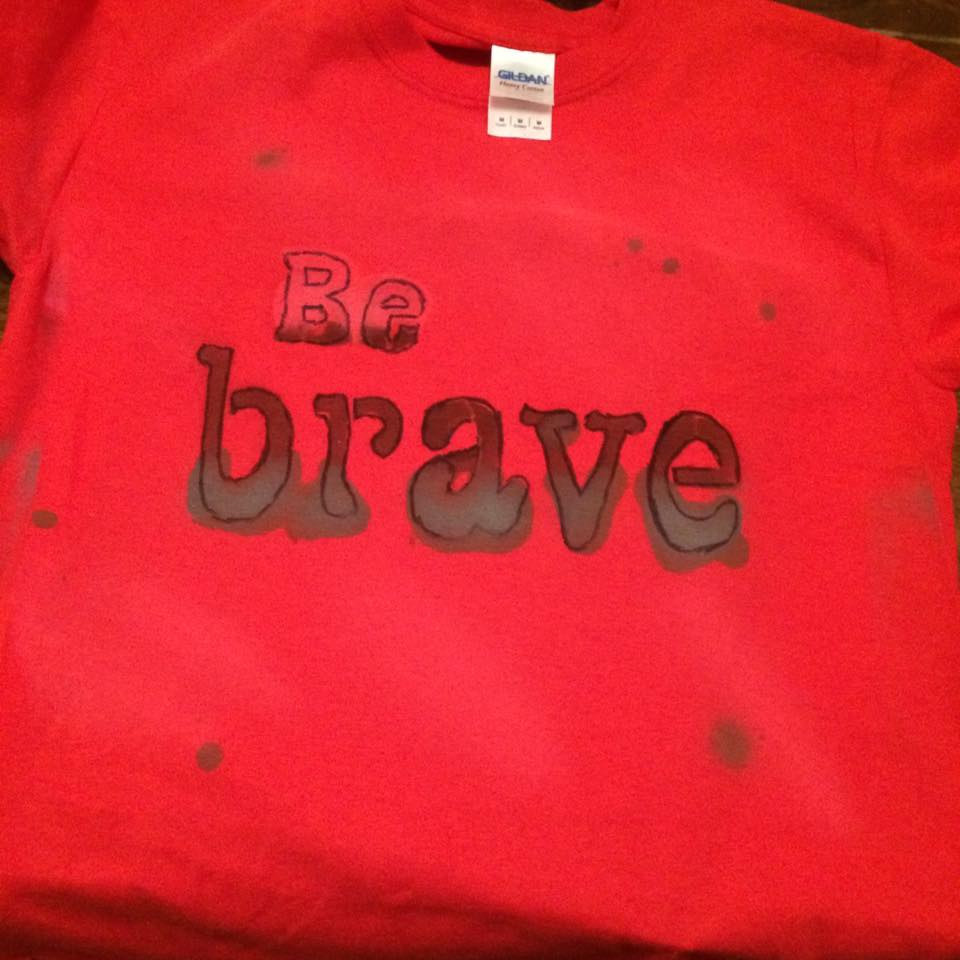
The key to successful “screen printing” is to use simple prints and block lettering. The less intricate your design, the easier it is to get a clean image, especially when you are just beginning.
1. Freezer Paper Stencil
You can use freezer paper to make a stencil if you have access to a printer. Follow the instructions here: Stencil Shirts With Freezer Paper – Instructables. Using this method teens can design their own stencils in a graphics program to make truly unique t-shirts. It involves the most amount of tech in our low tech process. You’ll want to make sure and design a simple image without a lot of lines and details to be effective; also, cutting the stencil out with an exacto knife can be tedious so simpler is quicker, easier and cleaner.
This method is also good because you can then just iron your stencil on to your t-shirt and remove it when you are done. Some tutorials we read/watched said you could use wax paper but we did not find this to be true – it absolutely works best if you use freezer paper. Using this method, you will only be able to use your stencil once.
2. Card Stock Stencil
You can also make your own stencil using a heavier card stock. You can find those instructions here: Make Your Own Stencil – Instructables. You’re basically going to do the same thing as above: design, print an image, and cut it out with an exacto knife.
3. Buy Stencils
ADVERTISEMENT
ADVERTISEMENT
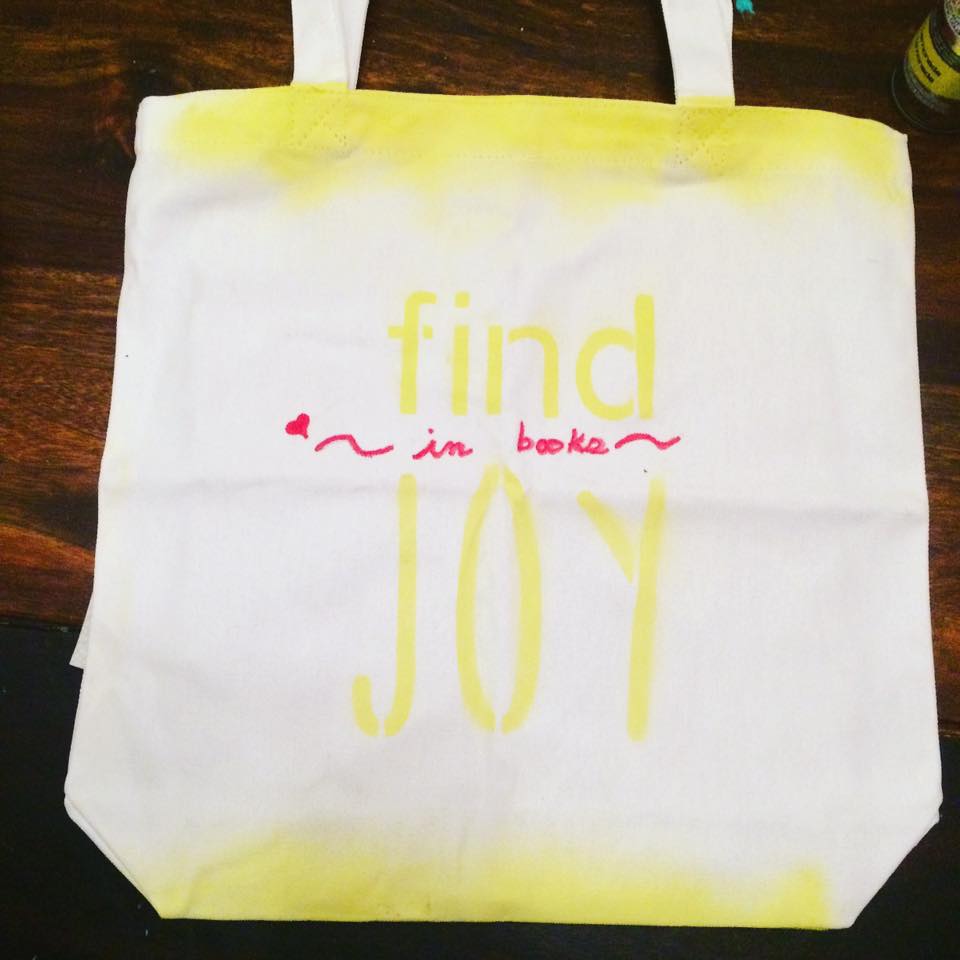
Folkart makes a series of large stencils that fit nicely on t-shirts and tote bags. You can buy them here. This is the easiest method by far, but it eliminates a lot of the tech as teens are no longer engaged in designing and printing out their own stencils.
Preventing Bleeding
When using a stencil, it can be easy for the paint or ink to bleed under the stencil, which makes your design look like a muddy mess. At the screen printing studio they use a temporary glue that helps hold the screen in place and acts as a resist. You can use 202 No Pins fabric adhesive spray to temporarily hold your stencil in place and act as a resist. Once you are done applying your paint/ink and allow your design to dry a little bit, you just lift off your stencil.
Applying Your Medium
As I mentioned, you do not actually need a screen to do this process. But if you want a more authentic experience, you can make your own screens using either an embroidery hoop or building one out of wood. I found the results to be the same whether I used the screen or not.
To apply your paint you can use either a sponge brush, an ink roller, or a screen printing wedge. I liked the sponge brush the most because I felt it gave me the most control regarding the amount of paint/ink I used. Also, you can buy a bulk pack of sponge brushes fairly cheaply so that multiple teens can make t-shirts at once. In comparison, a wedge can run you around $5.00+ and the ink roller was around $7.00.

After you apply your paint/ink, you’ll want to let your design dry a bit before removing your stencil. We used both a fan and a hair dryer.
It also works well on tote bags, in case you were wondering.
For more information, check out these resources:
D.I.Y. Screen Printing – Instructables
Down and Dirty Screenprinting for Under 10$ – Instructables
A 5 Minute Guide to Screen Printing Ink
Filed under: Makerspace
About Karen Jensen, MLS
Karen Jensen has been a Teen Services Librarian for almost 32 years. She created TLT in 2011 and is the co-editor of The Whole Library Handbook: Teen Services with Heather Booth (ALA Editions, 2014).
ADVERTISEMENT
ADVERTISEMENT
SLJ Blog Network
The 2025 Ninja Report: It’s Over
Book Giveaway: Foundling by D.M. Cornish
Ghost Town | Review
30 Contenders? Our Updated Mock Newbery List
When Book Bans are a Form of Discrimination, What is the Path to Justice?
ADVERTISEMENT