Making Text Transfer Chalkboard Speech Bubbles: Outreach at The Public Library of Mount Vernon and Knox County, Day 4
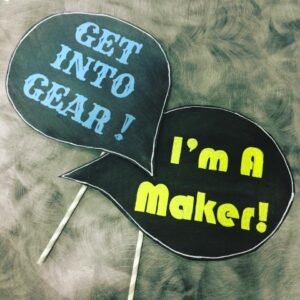
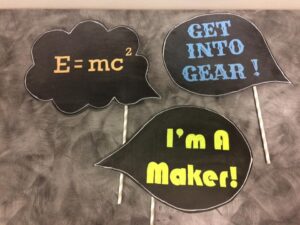 Here we are, day 4 discussing outreach and let’s talk about making chalkboard speech bubbles as photo booth props. Full disclosure: I have awful penmanship. I write myself notes and then later, I have no idea what they say. None. So I was worried about how we were going to make our speech bubbles for the photo booth. It turns out that Desiree, one of the Teen MakerSpace Assistants, knows how to do text transfer so we were able to make amazing looking chalkboard speech bubble props.
Text transfer is the process of printing off a text and then transferring it onto another medium. This allows you to not only have good penmanship, but to use fancy fonts.
ADVERTISEMENT
ADVERTISEMENT
Supplies
- A laptop/computer and printer
- Chalkboard scrapbook paper
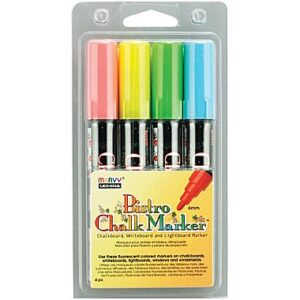
- Chalk markers (not chalk, chalk markers)
- A sharp pencil
- A ballpoint pen
- Dowel rods
- A hot glue gun
Step 1: Preparing Your Speech Bubble
We were able to buy a scrapbooking stack of 12×12 size chalkboard paper. This is the perfect size for a speech bubble. Pre-cut your shape so you know what size text you need to print off. If you would like, you can also use a piece of foam core and use chalkboard spray paint to cover your speech bubble. I have used chalkboard spray paint and find it works well. Either way, you end up with a chalkboard speech bubble as your canvas.
 Step 2: Printing Your Text
In order to do a text transfer, you are going to begin by printing off your word(s) from a computer. Select your font, and if you are looking for fun fonts you can try several free online font resources like 1001freefonts.com. Just create your word(s) like you would regularly. You can use Microsoft Word or a publishing program. Print off your text the size you want it to appear on your speech bubble, with exact spacing, punctuation, etc. Print it out and you are ready to begin your transfer onto the chalkboard.
Step 3: Preparing for the Transfer
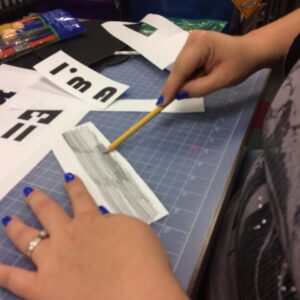
After you have printed your text, cut around it leaving a minimum of an inch on each side of all the letters. You will then turn your piece of paper over and completely shade the back side of your paper with a #2 pencil. Make sure and get that backside nice and dark and fill in every last space. Fill it in good.
Step 4: Making the Transfer
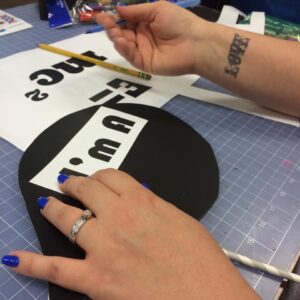
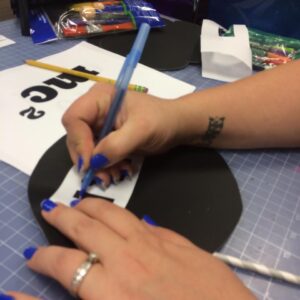
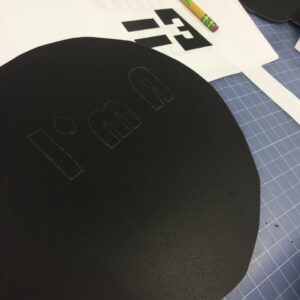
You will then turn your paper back over so the printed text is on the top. Place it where you want it to be located on your speech bubble and use your ballpoint pen to go around and outline the text. This will transfer the text in pencil onto your speech bubble. Don’t be afraid to press down hard.
Step 5: Finishing Your Speech Bubble
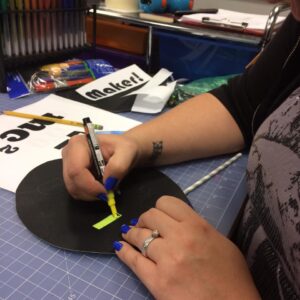
After your text is transferred, you simply outline it with your chalk marker and color it in.
Step 6: Giving It That Old Chalkboard Feeling
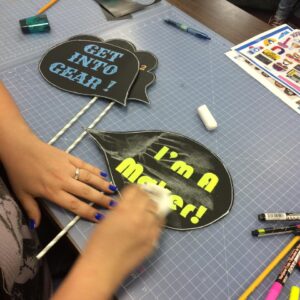
If you want to take it a step further and give it the appearance of a used chalkboard, simply take a piece of regular white chalk – not a chalk marker, but a piece of traditional chalk – and color over the entire speech bubble. Then take a tissue and wipe it off.
Step 7: Put a Stick In It, We’re Done
Hot glue a dowel rod to the back and you have a chalkboard speech bubble photo booth prop. Man, that’s a mouthful.
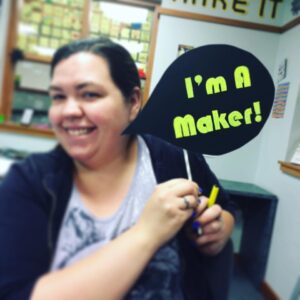
And here’s Desiree modelling her chalkboard speech bubble.
You can do this with any type of chalkboard sign. It doesn’t have to be a speech bubble. It doesn’t have to be a photo booth prop. It doesn’t even have to be a chalkboard. You can do it with regular paper and markers or gel pens. It has turned out to be a lifesaver for me, the person with epically awful penmanship.
And now we’re done with photo booth outreach. Tomorrow we will finish our outreach series by discussing teen coloring.
Outreach Week
Making Photo Booth Props: Outreach at The Public Library of Mount Vernon and Knox County, Day 3
Filed under: Makerspace, Outreach
About Karen Jensen, MLS
Karen Jensen has been a Teen Services Librarian for almost 30 years. She created TLT in 2011 and is the co-editor of The Whole Library Handbook: Teen Services with Heather Booth (ALA Editions, 2014).
ADVERTISEMENT
ADVERTISEMENT
SLJ Blog Network
And the 2024 Undies Case Cover Awards Go To . . .
31 Days, 31 Lists: 2024 Easy and Early Chapter Books
Exclusive: Papercutz to Publish Mike Kunkel’s Herobear | News and Preview
The Heavy Medal Book List Discussion Schedule (and more fun stuff coming in the next six weeks)
The Seven Bills That Will Safeguard the Future of School Librarianship
ADVERTISEMENT
