Building Our Portable Photo Booth – Outreach at The Public Library of Mount Vernon and Knox County, Day 2
 Yesterday I shared with you that this week was all about outreach and introduced you to our basic format. Today, I’m going to share with you how we created our portable outreach photo booth.
Our primary outreach event is called First Fridays, which is a downtown festival with food trucks, an outdoor concert, and an opportunity for local businesses to promote themselves with booths. On average, we have noted that we talk to anywhere between 200 and 400 people in the space of 3 hours. We had a module where we made buttons, and it turns out they are very popular but making 300 buttons in 3 hours can be exhausting. And after 3 First Fridays, we wanted to kind of spice it up and show a different side of the Teen MakerSpace. So we decided to make a portable photo booth. This turned out to be a fun and popular decision.
ADVERTISEMENT
ADVERTISEMENT
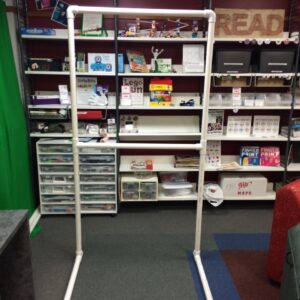
We needed a photo booth that was easy to transport and set up/take down. After a lot of research, we used this as our model. We only made on slight change in that we have to different sizes of cross bars so that we can have a smaller or wider photo booth depending on the size of the space we are in. Also, we have both a green screen and a black background. We just bought cheap sheets at the local store and these work fine.
 Supplies needed:
PVC Plastic Pieces/Pipes
(These can purchased at Lowe’s or some other home repair store)
2 pieces of PVC elbows (for your top connectors)
4 pieces of PVC “T” connectors (2 for your middle cross bar, 2 for your feet)
10 pieces of PVC cut to 3 feet (2 for your back cross bars, 4 for your height, and 4 for your feet)
2 pieces of PVC cut to 5 feet (if you wish to have a larger width photo booth)
Please note: all your pieces of PVC pipe should be the same. We used 3/4 of an inch in diameter. In this picture shown we have used the smaller PVC pipe for our crossbars.
Additional Supplies
- A black flat sheet (technically you can use any color that you would like)
- A Kelly Green flat sheet (if you want to use your photo booth as a green screen)
- Alligator clips (to hold your cloth in place)
- Various sizes of binder clips
- Some type of banner
- Photo booth props (tomorrow we will talk about making your own)
Our total cost was about $50.00, including one sheet.
Setting Up the Photo Booth
Once you have all your pieces cut to the correct size, setting up is easy. As I mentioned, we have to sizes of cross bars so our width can be either 3 feet across, which fits one person, or 5 feet across, which accommodated groups pretty well. We have used it both as a green screen and as a basic backdrop. You will need at least 2 staff to set up and take down the portable photo booth. I also recommend making step-by-step photo instructions.
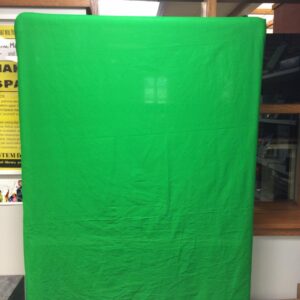
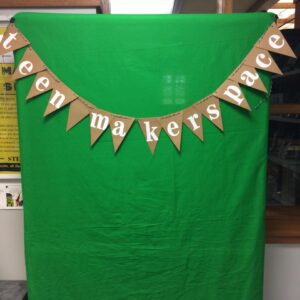
After you set up your frame, you’ll need 2 people to drape your sheet over the frame. Especially if you are using it as a green screen, you want to pull your sheet as tight as possible. Wrinkles can cause lighting issues which can cause the green screen to not be properly replaced with your software. Good lighting is really important when using a green screen as well.
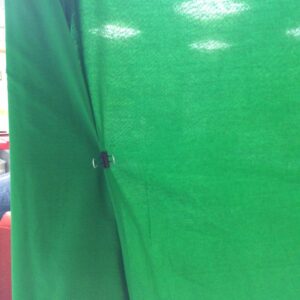
We used both binder clips and alligator clips to pull the material tightly in the back and keep it in place.
We made a banner so that people knew who we were using triangles, string and giant letter stickers. We eventually made gears to decorate our banner, which is not shown here.
ADVERTISEMENT
ADVERTISEMENT
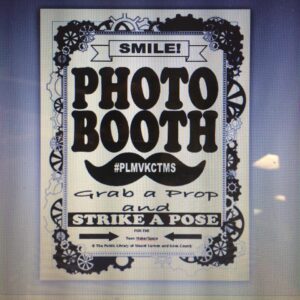
Signage is very important – as is creating a hashtag. People were invited to take their own pictures and staff used their devices to take pictures as well using the library’s account. All pictures were tagged with the hashtag so that patron’s could go find them online. In addition, we had a slip of paper that we handed to each person telling them about the library, about the hashtag, and inviting them to come into the Teen MakerSpace where we could show them how to print their picture and make it into a button or use some of our photo apps to add text and filters.
Tips and Tricks
The night we first used our portable photo booth turned out to be a really windy night. We had to have staff sit on each side of the photo booth with their foot on the bottom bar to keep it stable. We are talking getting a bar of rebarb to slide through the bottom to help with this in the future. We also discussed sand bags, though we are hesitant to add more bulky, heavy items to our set up. Just know that if you are outdoors wind can be an issue and you may need a stabilizing agent.
For the larger size booth – 5 feet across – we cut the PVC pipe to 5 feet. This means that we had these longer pieces to carry. We are talking about cutting them in half and adding another connector so that all the PVC poles are shorter and we can fit them into a larger gym bag. The jury is still out on this.
Final Verdict
I love the portable photo booth! Everyone had a really great time and it was very easy to set up and take down. And to be honest, it was easier on staff then making 300 buttons in 3 hours.
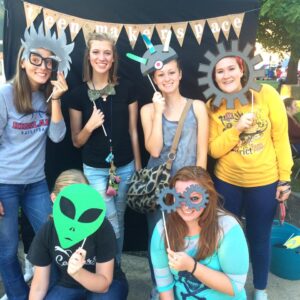
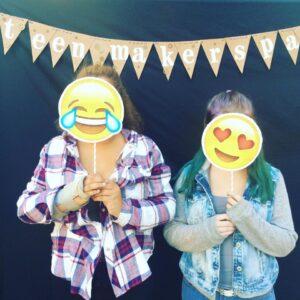
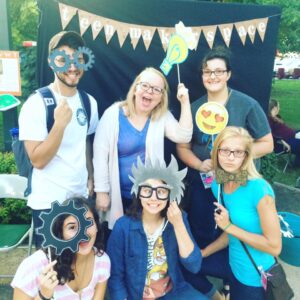
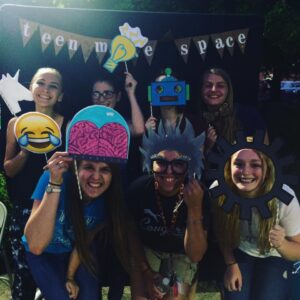
Here are some of the pictures we took . . .
Tomorrow, I will share with you how we made our own photo booth props, what worked . . . and what didn’t.
Filed under: Makerspace, Outreach
About Karen Jensen, MLS
Karen Jensen has been a Teen Services Librarian for almost 30 years. She created TLT in 2011 and is the co-editor of The Whole Library Handbook: Teen Services with Heather Booth (ALA Editions, 2014).
ADVERTISEMENT
ADVERTISEMENT
SLJ Blog Network
One Star Review, Guess Who? (#202)
This Q&A is Going Exactly As Planned: A Talk with Tao Nyeu About Her Latest Book
Exclusive: Giant Magical Otters Invade New Hex Vet Graphic Novel | News
Parsing Religion in Public Schools
ADVERTISEMENT






I am so excited to try this photo booth idea. Your last sentence says you will show us how you made the props tomorrow. How do I access that idea page?
Carol,
Here’s how we made the photo booth props: https://www.teenlibrariantoolbox.com/2016/09/making-photo-booth-props-outreach-at-the-public-library-of-mount-vernon-and-knox-county-day-3/
And here’s how we made our photo booth prop holder: https://www.teenlibrariantoolbox.com/2016/12/makerspace-making-a-photo-booth-prop-holder/
I love our photo booth and hope you enjoy yours!
Karen
Great post. It is very informative post for everyone I love reading this information. This is a perfect blog. Keep posting and keep sharing like this.