TPIB: Photo Shrink Jewelry Charms
 Although we have some permanent stations set up in our Teen MakerSpace at The Public Library of Mount Vernon and Knox County, we also occasionally rotate in some different stations to make sure our teens have a variety of activities to engage in. One of our permanent stations includes a bank of iPads which we encourage the teens to do many things with, including create digital media and do photo manipulation. If you have read many posts here at TLT, you know that I am quite obsessed with photo apps and photo manipulation and creation. It is one of my favorite things to do (my phone currently has 14,000 pictures on it and that is not hyperbole). And I then like to find creative things to do with those photos: like turn them into shrink plastic jewelry.
If you are thinking Shrinky Dinks – well, you are right, kind of. Shrinky Dinks are a brand name, there are other types of shrink plastic. And there is shrink plastic that you can put right into your printer, which is my kind of shrink plastic. So this summer, we made photo shrink plastic jewelry with our teens. Today I’m going to tell you how.
ADVERTISEMENT
ADVERTISEMENT
Supplies
- 2.25 circle punch. I use this one, but you can also just shape fill a 2.25 circle on your computer’s graphics program and a pair of scissors. I like the circle punch because it is a clean circle and it is quick.
- Standard single hole punch (1/4 inch)
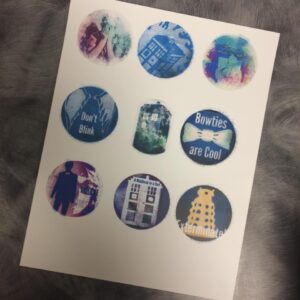
- Photo printer shrink plastic, as pictured above. There are a few brand options, just make sure it says photo or printer friendly.
- Some type of technology and a printer
- A heat source: I recommend a toaster oven
- A brown grocery bag or lunch sack
- A metal tray (this usually comes with your toaster oven)
- Oven mitts
- A hot pad or trivet
- Jewelry making findings and tools
Step 1: Creating your images
Before your can print and shrink your images, you need to create your images. For example, you can use Instagram images. Or use any variety of apps to create the images you would like to create(see below for a list of my favorites). When creating or choosing an already existing image, you want to make sure of two things:
1) That they will fit into the 2.25 inches size nicely and
2) That putting a hole in the top or on the sides – more about this in a moment – won’t obscure the important parts of the image. For example, if you are doing a photo with people you’ll want to make sure that you won’t be cutting off their heads when you put a hole in the top.
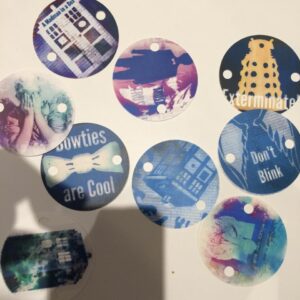
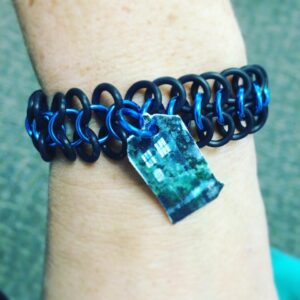
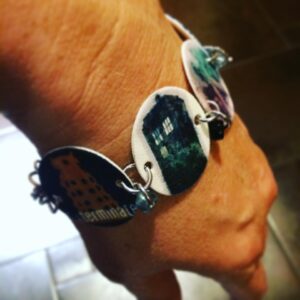
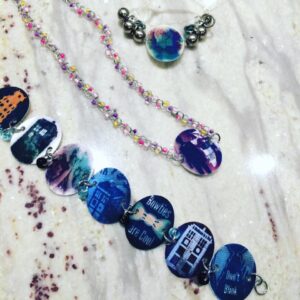
For my example bracelet, The Mr. had created a series of Doctor Who inspired silhouette drawings to decorate The Teens room. I took pictures of those pieces of art and used a variety of apps to add backgrounds, text, etc. I then uploaded the images to my laptop so that I could print them.
Step 2: Printing your images
You’ll want to follow all printing instructions on your shrink plastic. For example, you will want to reduce the color intensity because the colors gets darker when the images shrink.
For making jewelry charms, after much experimentation, we have found that 2.25 inches is a good size to begin with pre-shrink. In addition, a standard hole punch at the top shrinks down to a good size for a top loop and threading onto some type of jewelry finding. You can alternately put a hole on the left and right side using your hole punch to make a fitted charm bracelet where you loop thread or o rings through both sides of the charm.
After you print your image you’ll want to make sure not to touch the image so that the ink doesn’t smear or smudge.
Step 3: Shrinking your images
ADVERTISEMENT
ADVERTISEMENT
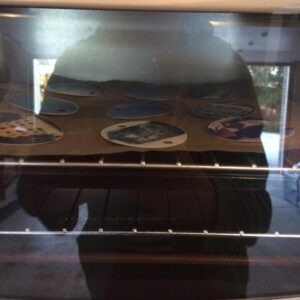
Again, you’ll want to follow all the package instructions for using the shrink plastic. Typically you set your toaster oven to 325 degrees. You’ll want to place your images on a piece of brown paper bag that fits inside your toaster oven; this just makes it easier to remove for cooling. The paper goes on the metal tray which you put in the oven (though it also works if you lose the metal tray which I’m not saying I did but the image below proves). When you take the metal tray out you can remove the paper and set it on a heat safe surface to cool. We used a left over piece of ceramic tile, but any type of hot pad or trivet will do.
The shrinking happens pretty quickly so you need to stay right there and watch your items in the oven. They will briefly curl up and it will scare you because you think, “Oh no, they’re going to fold in on themselves.” And yet somehow they don’t. When they are flat again, wait like 2 beats more and then remove the tray to cool.
We have done this in the library with teens and you want to make sure you have an adult supervising the toaster oven at all times. The items get hot and letting them cool down is essential.
Step 4: Turning your images into jewelry – or something
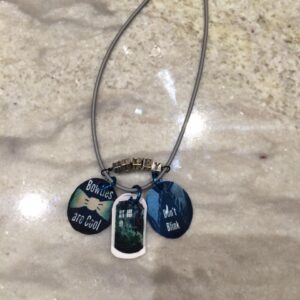
In the most basic sense, you can thread a single charm onto a basic hemp cord and you have a necklace. You can also string beads between several charms and create a necklace or bracelet. I happen to be lucky and my Assistant Director does chain mail as a hobby and this is a fantastic way to make a charm bracelet. Here are a couple of our creations to give you some ideas.
Don’t want to make jewelry? Don’t put any holes in your plastic, shrink like normal, slap a magnet on the back and you have one of a kind magnets.
There’s a Book for That
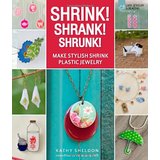
And because we try to have a book for every activity we do or station we create in our Teen MakerSpace, we were very excited to find this book:
A Couple of Notes
We experimented with other shapes, but found that circles worked best and didn’t have any rough edges that could poke.
You can technically do this with traditional shrink plastic and hand drawn images as well. For example, we found that our teens loved to make their initials or names.
Some of Karen’s Favorite Photo Apps
How Did You Do That? Photo Apps Version
Tech Talk: App Review – BeFunky
Generate Marketing Creativity with iPhone Apps
More Photo Crafts
10 Things to Do with a Blank Canvas part 1 and part 2
Share it! Miss Peregrine’s Home for Peculiar Children
Filed under: Photography, Programming, Programs, Teen Program in a Box, Teen Programming, Teen Programming in a Box, TPIB
About Karen Jensen, MLS
Karen Jensen has been a Teen Services Librarian for almost 30 years. She created TLT in 2011 and is the co-editor of The Whole Library Handbook: Teen Services with Heather Booth (ALA Editions, 2014).
ADVERTISEMENT
ADVERTISEMENT
SLJ Blog Network
Name That LEGO Book Cover! (#53)
Cover Reveal and Q&A: The One and Only Googoosh with Azadeh Westergaard
Exclusive: Vol. 2 of The Weirn Books Is Coming in October | News
Fighting Public School Book Bans with the Civil Rights Act
ADVERTISEMENT

