The Making of Our String Art “READ” Sign
This year, I am pretty excited because not only did we debut the new Teen MakerSpace, but I was able to hire two MakerSpace Assistants to help keep the area staffed after school and on weekends. One of my assistants is Morgan Durfee, who was an art major in college and is an awesome cos-player. In fact, she has done a couple of cosplay programs for us here at The Public Library of Mount Vernon and Knox County. You can follow her on Instagram: @nightingale_vixen

Because of her artististic talents – which are awesome! – she gets recruited to do a lot of projects. To be fair, it’s what she signed up for as the TMS Assistant. She recently made a fantastic string art “READ” sign for us to put on display in our Teen MakerSpace. We got the idea while looking for string art information online. Here’s the how of it if you are interested. It takes several days, but it is very much worth it because the sign has high visual appeal and impact. Also, Morgan made the sign in the Teen MakerSpace because we like to model making behavior as well as being open to provide assistance to anyone who may need it while using the space.
ADVERTISEMENT
ADVERTISEMENT
Supplies:
- 2 1/2 foot by 1 foot piece of plywood
- 250 small nails
- Mod Podge
- Sponge brush
- Template for the letters READ (we printed ours off easily in Word)
- String (we used craft floss)
- Discarded book
Step 1: Preparing Your Board
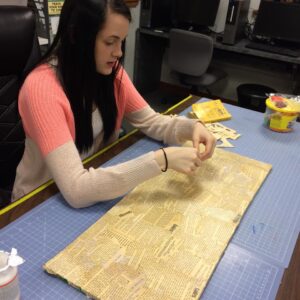
Morgan decoupaged the background using Mod Podge and pages of a discarded book. This step took about an hour and then we left it to dry overnight. She is now working on one made with comic book pages which I think will look stunning.
Step 2: Setting the Nails
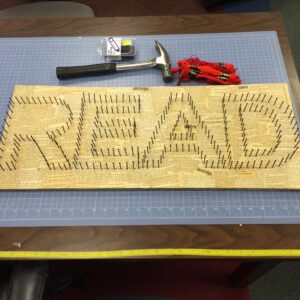
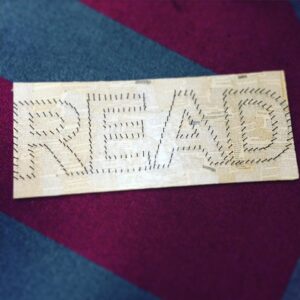
To create the word READ, we printed off letters from Word on our computer. Each letter was the size of an 8 1/2 by 11 sheet of paper. For visual effect, we wanted strong, bold letters. Morgan then cut each letter out and used a black marker to outline the letter with little dots to guide where she would put the nails. It took her around 3 hours to get all of her nails in place. We are exploring the option of using a nail gun if we repeat the project.
Step 3: Stringing the Letters
The next step took about an hour. Morgan weaved the string – we chose red for visual impact – in between and across the various nails, tying off each end of string with a solid knot to prevent unraveling.
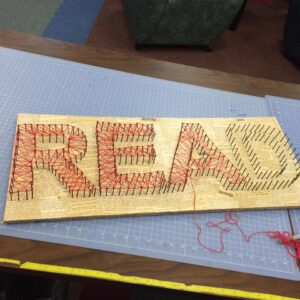
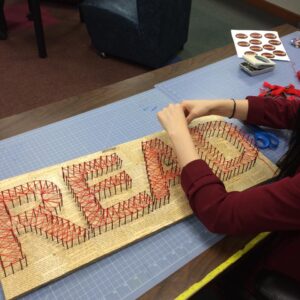
Voila! Here’s our completed sign. I love it so much.

Filed under: Makerspace
About Karen Jensen, MLS
Karen Jensen has been a Teen Services Librarian for almost 30 years. She created TLT in 2011 and is the co-editor of The Whole Library Handbook: Teen Services with Heather Booth (ALA Editions, 2014).
ADVERTISEMENT
ADVERTISEMENT
SLJ Blog Network
Newbery/Caldecott 2025: Spring Check-In
Ellen Myrick Publisher Preview: Spring 2024 – Cicada, Creston, Diamond, and Eye of Newt
Number Call | Review
It’s Time for More Mock Newbery Suggestions
ADVERTISEMENT

