TPiB: How to Make a Photo Meme
 The Teen, The Bestie, some neighborhood kids and I spent the weekend perfecting our Meme process so that I could add a new station to my Maker Mondays. Our goal was to combine using technology with something artistic to create a great STEAM project that allowed teens to learn some new skills, explore some photography basics, and have a chance at self-expression. After creating our memes we then used this TPiB to turn our Memes into Magnetic Duct Tape Locker Frames.
The Urban Dictionary defines a Meme as “1 : an idea, belief or belief system, or pattern of behavior that spreads throughout a culture either vertically by cultural inheritance (as by parents to children) or horizontally by cultural acquisition (as by peers, information media, and entertainment media) ” (Source) So what the teens were trying to do was create their own meme ideas that may or may not of course go viral. But that really wasn’t the point, the point was to learn the creation process.
ADVERTISEMENT
ADVERTISEMENT
Step 1: Take Your Picture
We used smart phones and a variety of apps for this activity, though tablets or even a digital camera and a laptop with some photo editing software would do. Here we talked about composition, lighting and basic layout. The A Beautiful Mess blog has some great photography tutorials. For the purposes of our activity we took a regular picture using the basic camera so that we would have a natural image that we could try various ways of manipulating to see what we liked best. That way, if we ended up going a step too far we had a clean image to start over with.
We also talked about how you could create a basic image and make it artistic. With the right lighting and quote, even a park bench can make for an amazing picture.
Also, this is a really great time to talk about copyright. We made sure that all images were created by us in order to avoid any copyright issues. We discussed why it was important that the original image be created by you and how you couldn’t just download other images from the web or Instagram.
Step 2: Manipulate Your Image
We then ran our images through a variety of apps to see what we could do. We played around with filters, borders, overlays, vignettes, contrast and more.
Some of the apps we used included:
- Be Funky: our hands down favorite for filters and adding text all in one
- Photo Candy: great for overlays and warping images
- Diptic: creates multiple panel creations
- PhotoShake: creates grid photos, which proved very popular
- A Beautiful Mess: has some fun whimsical elements
Some of the apps we tried and were less enthusiastic about include Candy Cam, Font Killer, Space Effects and Insta Blend. These apps either proved too limited in what they could do or were so complicated we couldn’t figure out how to use them well. Please note, some of these apps cost a fee.
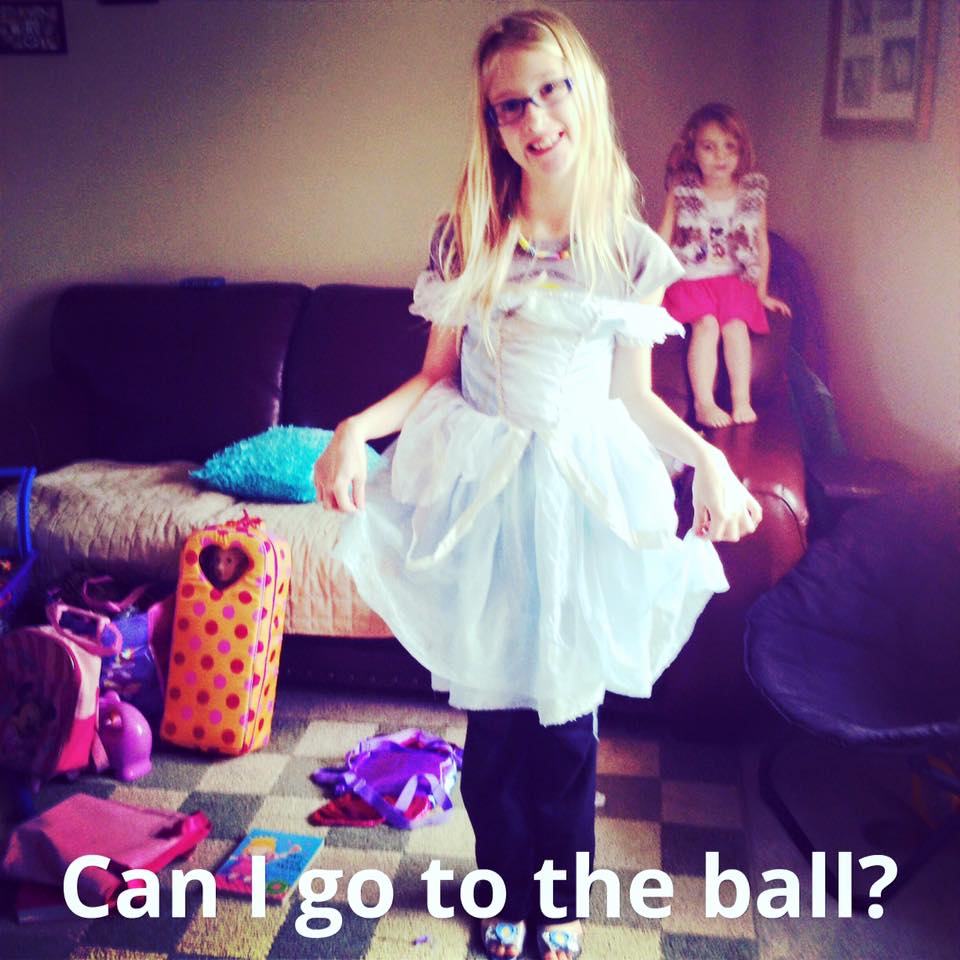
Step 3: Add Your Text
Part of the fun was in creating text to go with our images. We used things like:
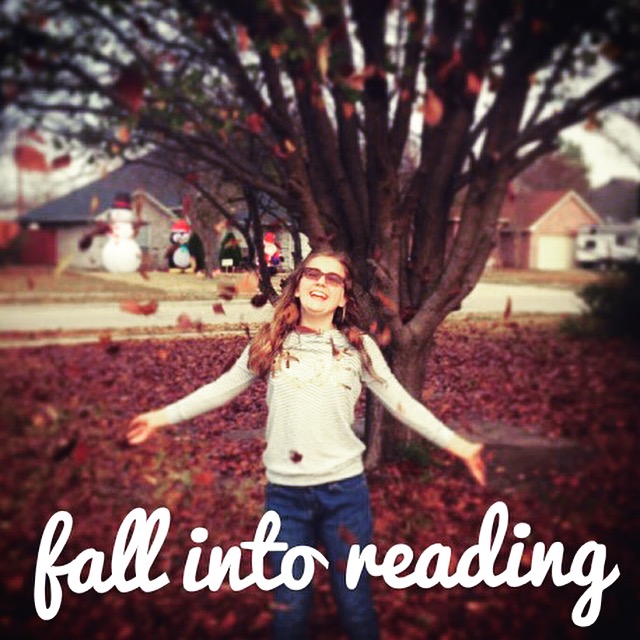
- Reading or book related themes (see Fall Into Reading above)
- Our favorite book, tv and movie quotes
- And we made a lot – and I do mean A LOT – of Doctor Who themed ones.
To create the Doctor Who themed ones I took a picture of some canvas art made by The Mr:

And then we ran them through the Be Funky app and added text:
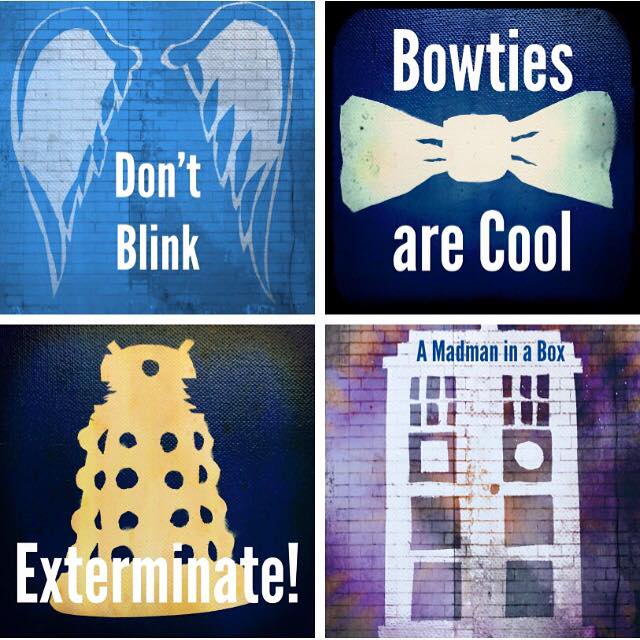
They look amazing printed out!
You can easily add text in many of the apps above, like the Be Funky app, which is the app we used to make the Doctor Who pics above. But if you don’t mind multiple steps and the app you are using doesn’t have a font you like you can always use the Over app to add text to a picture. This is my favorite app for adding text.
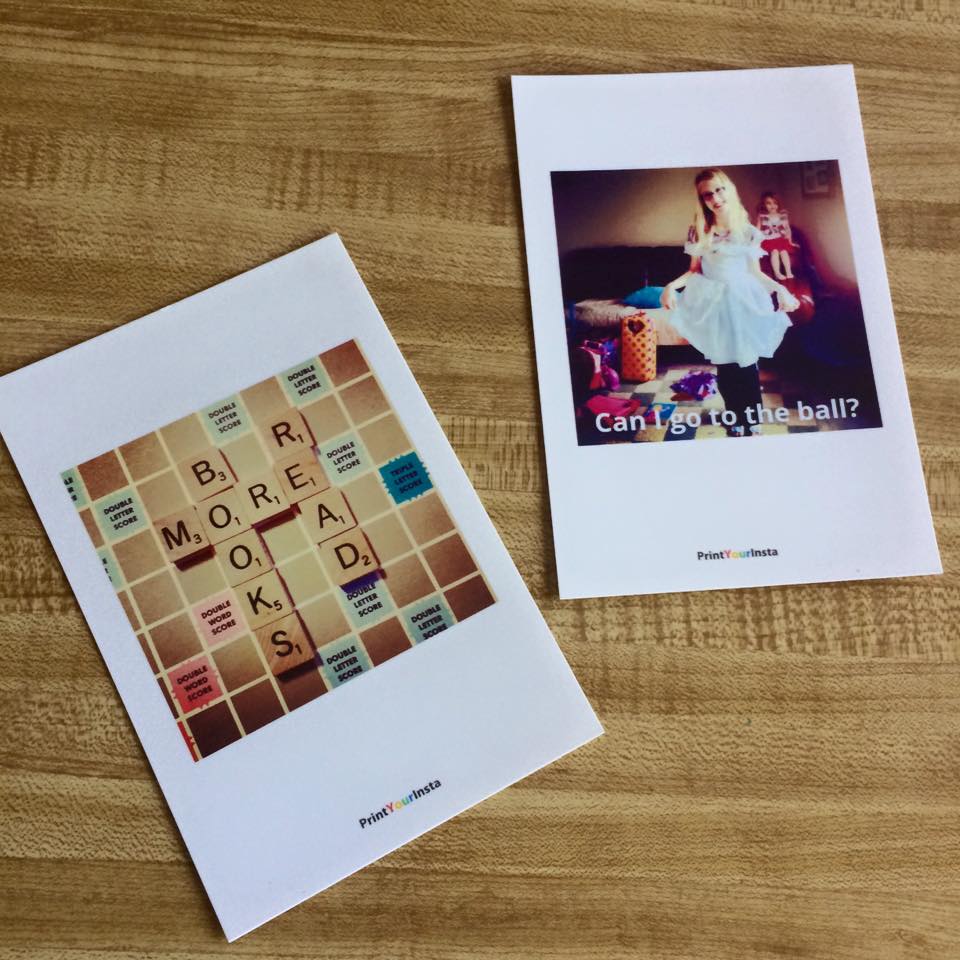
Step 4: Share Your Photo/Meme
Because we created our Photos/Memes on a smart phone, they were really easy for the teens to just upload and share on their social media. Some of the things you can do with your photos/memes include:
- Share on your social media outlets
- Print them out and frame them, including the fun Magnetic Duct Tape Frame tutorial we shared last week which makes these the perfect locker decorations
- Print them out on regular photo copier paper and mod podge them onto a canvas to make some great canvas wall art
- Use this process to make art for your teen area or end cap displays
- Host a teen art exhibit; go big and have an opening night with refreshments and everything
For my Maker Mondays (which I hope to turn into a MakerSpace soon), my ideal would be to have at least one iPad with all the above apps loaded so that teens can come in and play around with the images on their own as well as in programs. We would of course provide some directions and examples, but I think it would be a great way to get teens hands on tech while encouraging them to explore creative design and engage in self expression.
For more on Makerspaces and reviews of some of the apps mentioned above, go here.
You can see a gallery of some of our photo memes here.
Filed under: Tech Talk, Technology
About Karen Jensen, MLS
Karen Jensen has been a Teen Services Librarian for almost 30 years. She created TLT in 2011 and is the co-editor of The Whole Library Handbook: Teen Services with Heather Booth (ALA Editions, 2014).
ADVERTISEMENT
ADVERTISEMENT
SLJ Blog Network
One Star Review, Guess Who? (#202)
This Q&A is Going Exactly As Planned: A Talk with Tao Nyeu About Her Latest Book
More Geronimo Stilton Graphic Novels Coming from Papercutz | News
Parsing Religion in Public Schools
ADVERTISEMENT