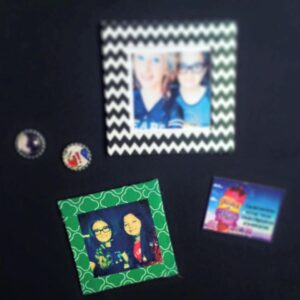
TPiB: DIY Instagram Magnetic Duct Tape Frames
 I am, as I believe we have discussed, obsessed with Instgram. Not so much the app as a social media tool, in fact my Instagram account is private in part because I take so many pictures and I figure everyone would be annoyed if they actually followed me. I like the filters and the light effects and the cute little square sizes.
Also, you should know that I use Instagram completely wrong. I take my picture using the regular smart phone camera and then I run it through Instagram so I can enlarge areas that I want, create the lighting that I want, etc. Sometimes I will run a picture through Instagram multiple times to see which effects I like best.
ADVERTISEMENT
ADVERTISEMENT
Last week I did something stunning and I actually printed some off. Then we went and bought frames. The frames run anywhere from $3 to $15. This, I thought, is something we can definitely do as a MakerSpace activity. So The Teen and I spent the weekend figuring it out. The black and white frame is our inspiration and the look we were trying to emulate.
First, a note about printing out Instagram pictures:
You can, of course, download your Instagram pics to your regular computer and use some type of a program to print them off. If you have your printer set up correctly, you can also print wirelessly using airprint. HOWEVER, if you print an Instagram picture directly from your photos folder on your smartphone it will stretch out and print 4×6. This is not the desired effect that you want. You can not print wirelessly directly from the Instagram app. BUT you can download an app called Print Your Insta and it will print your Instagram photo in the small square format. The app is technically free, but you have to buy the 99 cent upgrade to remove the watermark. This app will print your Instagram print directly from your Instagram account at a 3.5 by 3.5 size.
Materials and Supplies
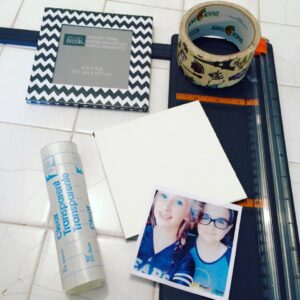 We started with the model of the picture frame that we had purchased. It’s a great size and magnetic on the back so it fits perfectly in school lockers. To recreate this size and look we used the following:
One piece of photo matte board. We recommend 4.5 by 4.5 or 5 by 5 in size.
Clear contact paper. If you have access to it, those clear dry erase sheets that we used to use for overhead projectors also works. You will cut it the same size as your photo matte board.
Duct tape of choice.
Magnets. We used a roll of magnets because it was the cheapest and I don’t really recommend these magnets. Buy stronger individual magnets because the roll of magnet tape was hard to get to stay flat and it wasn’t as strong as other magnets.
The normal items like paper cutters and scissors come in handy as well.
The DIY Process
ADVERTISEMENT
ADVERTISEMENT
Cut your photo out. You want to leave a small white edge along the border for taping it down. This white edge also provides a great guide for duct taping to help keep your edges straight, bonus.
In order to help the photo stay on the photo matte we used a small piece of acid free scrapbooking tape. We then taped the photo into the center of the matte board.
With our photo in place, we used our duct tape to cover the edges to create a cool border. Because we are perfectionists, we also completely covered the back. You don’t need to do this, it wastes tape to be perfectly honest, but we liked how it created a cleaner, cohesive look.
Apply your magnets to the back.
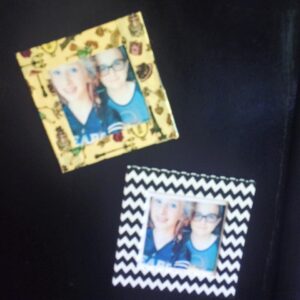
Voila – you have a fun Maker project. We made a ton for The Teen to give to all of her friends to put in their lockers as we perfected the process. My fridge is also now covered in them. Since we bought the items in bulk, as we create more framed pictures the cost goes down. More importantly, we got to have fun together while making unique, one of kind items to preserve precious memories and decorate our home.
For more fun program ideas, including more ideas of what to do with your Instagram pictures, check out our Teen Programs in a Box.
Filed under: Teen Program in a Box, Teen Programming, Teen Programming in a Box, Teen Programs in a Box, TPIB
About Karen Jensen, MLS
Karen Jensen has been a Teen Services Librarian for almost 30 years. She created TLT in 2011 and is the co-editor of The Whole Library Handbook: Teen Services with Heather Booth (ALA Editions, 2014).
ADVERTISEMENT
ADVERTISEMENT
SLJ Blog Network
One Star Review, Guess Who? (#202)
This Q&A is Going Exactly As Planned: A Talk with Tao Nyeu About Her Latest Book
Exclusive: Giant Magical Otters Invade New Hex Vet Graphic Novel | News
Parsing Religion in Public Schools
ADVERTISEMENT

